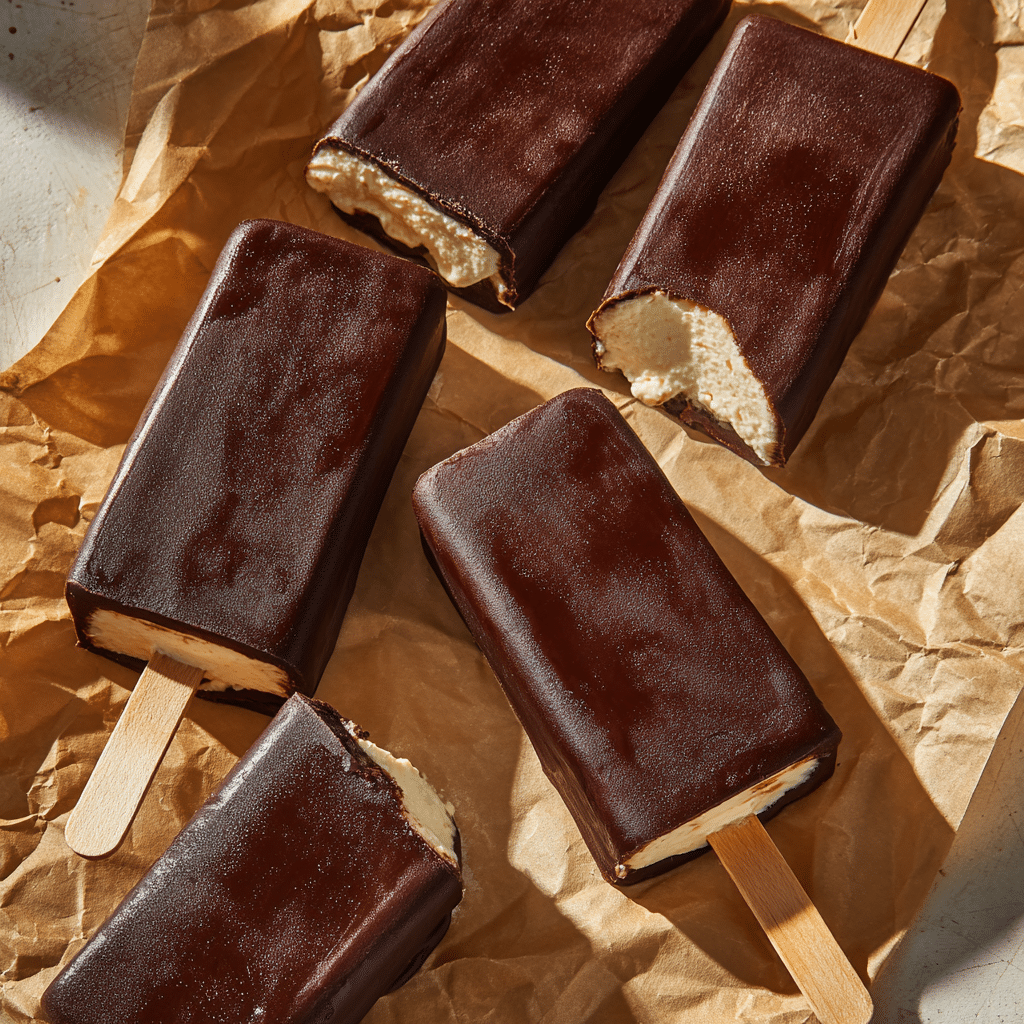
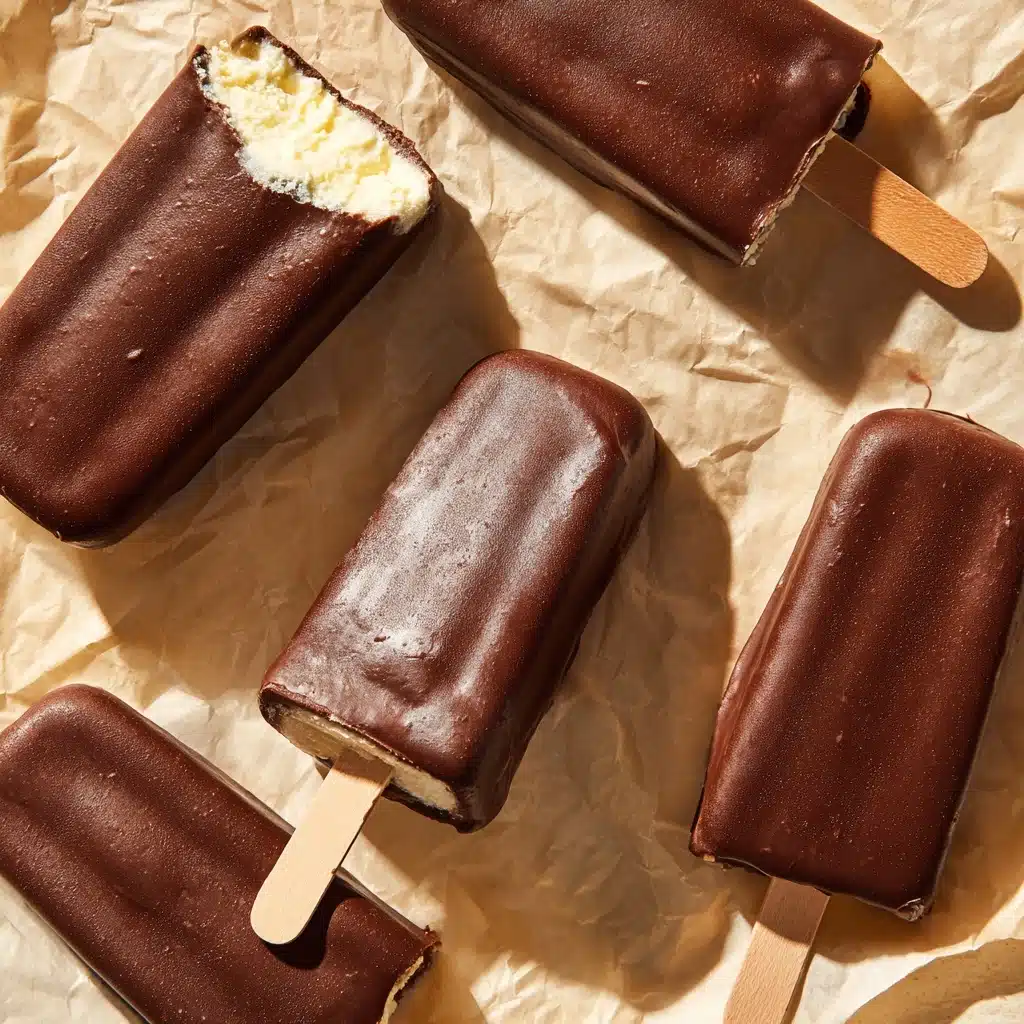
Chocolate Covered Banana Ice Cream Bars Recipe
If you’re looking for a decadent, dreamy frozen treat that absolutely everyone will love, look no further than these Chocolate Covered Banana Ice Cream Bars. Creamy, naturally sweetened banana ice cream layered inside a crisp dark chocolate shell makes for a dessert that’s not just simple to make, but seriously satisfying. Each bite is a harmonious blend of smooth, sweet, and rich flavors that’ll leave you wondering why you ever settled for store-bought bars. Whether you’re cooling off on a summer afternoon or just in need of a pick-me-up any time of year, these bars are about to become your new favorite indulgence!
Ingredients You’ll Need
One of the best things about Chocolate Covered Banana Ice Cream Bars is that the ingredient list is short, super straightforward, and packed with everything you need for flavor, creaminess, and crunch. Let’s break down what you’ll need and why each element is so important.
- Bananas: Ripe bananas are the sweet, creamy base of your ice cream filling. The riper, the better for flavor and texture.
- Sunbutter (or any nut/seed butter): This adds a nutty richness and helps make the filling satisfyingly smooth. Both peanut butter and almond butter work great too.
- Honey (or maple syrup): Just a touch of natural sweetener enhances the banana’s flavor and helps balance the richness.
- Vanilla extract: Brings a subtle warmth and rounds out the flavors.
- Collagen (optional): Adds a bit of protein and creaminess, but you can skip it if it’s not your thing.
- Water: Helps blend the filling to the perfect consistency for pouring into molds.
- Dark chocolate chunks (or chips): The secret to an irresistible shell—choose a brand with at least 60% cacao for that deep, sophisticated flavor.
- Coconut oil: This helps thin the chocolate so it coats the bars smoothly and sets up with a luscious snap!
How to Make Chocolate Covered Banana Ice Cream Bars
Step 1: Blend the Filling
Add the ripe bananas, sunbutter, honey, vanilla extract, optional collagen, and water to your blender. Blend until the mixture is silky-smooth and totally uniform—no lumps allowed! Take a quick taste; it should be sweet, creamy, and fragrant with vanilla. This is your ice cream base, and it’s positively dreamy on its own.
Step 2: Pour, Stick, and Freeze
Grab your silicone popsicle molds and place a popsicle stick in each slot (tip: if you don’t have the exact mold, any freezer-safe mold will do). Carefully pour the blended mixture into the molds, aiming for even portions. Set the filled molds on a baking sheet or another flat surface so they freeze level. Let them chill in the freezer for at least 4 hours, or until they are completely solid. Patience is key!
Step 3: Melt the Chocolate Coating
Once your banana bars are frozen through, it’s time for magic—the chocolate dip! Put the dark chocolate chunks and coconut oil in a small saucepan. Gently melt them over low heat, stirring often, until you have a glossy, pourable chocolate sauce. If you want to dip easily, transferring the melted chocolate to a tall glass can help you achieve that perfect even coating.
Step 4: Dip the Bars
Working quickly (the chocolate will set fast on the frozen bars), remove your ice cream bars from the molds. Dip each bar into the melted chocolate, swirling if you love a thick coating. Let the extra chocolate drip off, then lay each bar on a parchment-lined baking sheet to set. Watch as the chocolate shell hardens almost instantly—so satisfying!
Step 5: Set and Enjoy
Once all your Chocolate Covered Banana Ice Cream Bars are coated and the chocolate is set, they’re ready to eat! If you want, place them back in the freezer for a bit to ensure everything is perfectly firm. Otherwise, grab one and enjoy that blissful crunch-meets-creamy experience.
How to Serve Chocolate Covered Banana Ice Cream Bars
Garnishes
Sprinkling a little crushed toasted nuts, cacao nibs, or shredded coconut over the wet chocolate before it sets will take your bars to another level. For a festive touch, try a drizzle of melted white chocolate or a dusting of flaky sea salt on top of each bar. Presentation is half the fun—don’t be afraid to play with color and texture!
Side Dishes
These bars are rich enough to serve solo, but if you want to turn your afternoon snack into a dessert party, they pair beautifully with a bowl of fresh berries, a scoop of vanilla yogurt, or even a chewy oatmeal cookie on the side. For adults, serve with a cup of espresso or cold brew for the ultimate treat combo.
Creative Ways to Present
If you’re making Chocolate Covered Banana Ice Cream Bars for a gathering, arrange them on a chilled platter lined with edible flowers or vibrant fruit slices. You can also stand the bars upright in glasses of colorful sprinkles or line them up in mini mason jars with ribbon-wrapped sticks for a playful touch at celebrations.
Make Ahead and Storage
Storing Leftovers
Any leftover bars can be stored in an airtight container in the freezer for up to 2 weeks. To prevent sticking, lay parchment or wax paper between each bar. This keeps the chocolate shell crisp and the banana ice cream fresh and creamy.
Freezing
Chocolate Covered Banana Ice Cream Bars are designed for the freezer, so don’t hesitate to make a double batch ahead of time. Always let newly dipped bars set fully before stacking or storing, and place them away from strong-smelling foods in the freezer to maintain that pure banana-chocolate flavor.
Reheating
While these bars are meant to be enjoyed frozen, if you prefer a softer texture, let a bar sit at room temperature for 2-3 minutes before eating. Avoid microwaving, as this can melt both the filling and the chocolate coating unevenly.
FAQs
Can I use a different nut or seed butter?
Absolutely! Feel free to substitute the sunbutter with peanut butter, almond butter, cashew butter, or even tahini. Each will give the Chocolate Covered Banana Ice Cream Bars a unique twist in flavor.
Is the collagen necessary?
Nope—collagen is totally optional. It adds just a hint of creaminess and a protein boost, but your bars will turn out delicious and creamy without it. Simply leave it out if you prefer.
Can I make these without a popsicle mold?
Yes! You can pour the filling into small paper cups, insert popsicle sticks, and peel off the cups once frozen. Ice cube trays or silicone muffin pans also make fun, bite-sized Chocolate Covered Banana Ice Cream Bars.
What kind of chocolate works best?
Dark chocolate (60 percent cacao or more) is recommended for its intense, satisfying flavor and thin, crunchy shell. Milk or semisweet chocolate works in a pinch but may yield a sweeter, less intense bar.
How can I prevent the chocolate coating from cracking off the bars?
Make sure your chocolate is fully melted and smooth, and dip the bars quickly. If your bars are extremely cold, let them sit out for a minute or so before dipping—the chocolate will adhere more evenly and resist cracking.
Final Thoughts
There’s something truly special about whipping up a batch of Chocolate Covered Banana Ice Cream Bars at home—especially when every bite is so delightfully creamy, chocolaty, and fun! Give this easy recipe a try and get ready to fall in love with your new go-to frozen dessert. Happy snacking!
PrintChocolate Covered Banana Ice Cream Bars Recipe

Indulge in these delicious Chocolate Covered Banana Ice Cream Bars that are a perfect treat for any time of the year. Creamy banana filling coated in rich chocolate makes for a delightful frozen dessert.
- Prep Time: 15 minutes
- Cook Time: 0 minutes
- Total Time: 4 hours 15 minutes
- Yield: 8 ice cream bars 1x
- Category: Dessert
- Method: Freezing, Blending, Melting
- Cuisine: American
- Diet: Vegetarian
Ingredients
Filling:
- 2 large, ripe bananas (about 210g)
- 1/4 cup sunbutter (or any creamy nut/seed butter)
- 1 Tbsp honey (or maple syrup)
- 1 tsp vanilla extract
- 2 scoops collagen (optional)
- 1/4 cup water
Chocolate Coating:
- 1 cup dark chocolate chunks (or chips)
- 1 Tbsp coconut oil
Instructions
- Prepare Filling: Combine all filling ingredients in a blender and blend until smooth.
- Fill Molds: Insert popsicle sticks into silicone molds. Pour the filling into the molds.
- Freeze: Place molds in the freezer for at least 4 hours until firm.
- Make Chocolate Coating: Melt chocolate and coconut oil in a saucepan over low heat, stirring until smooth.
- Coat Bars: Dip frozen bars into melted chocolate and place on parchment paper to set.
Notes
- You can customize the filling with your favorite nut or seed butter.
- Feel free to sprinkle chopped nuts or shredded coconut on the chocolate coating for added texture.
Nutrition
- Serving Size: 1 bar
- Calories: 180
- Sugar: 12g
- Sodium: 40mg
- Fat: 10g
- Saturated Fat: 6g
- Unsaturated Fat: 3g
- Trans Fat: 0g
- Carbohydrates: 20g
- Fiber: 3g
- Protein: 3g
- Cholesterol: 0mg
Keywords: Chocolate Covered Banana Ice Cream Bars, Frozen Dessert, Homemade Ice Cream, Healthy Treat