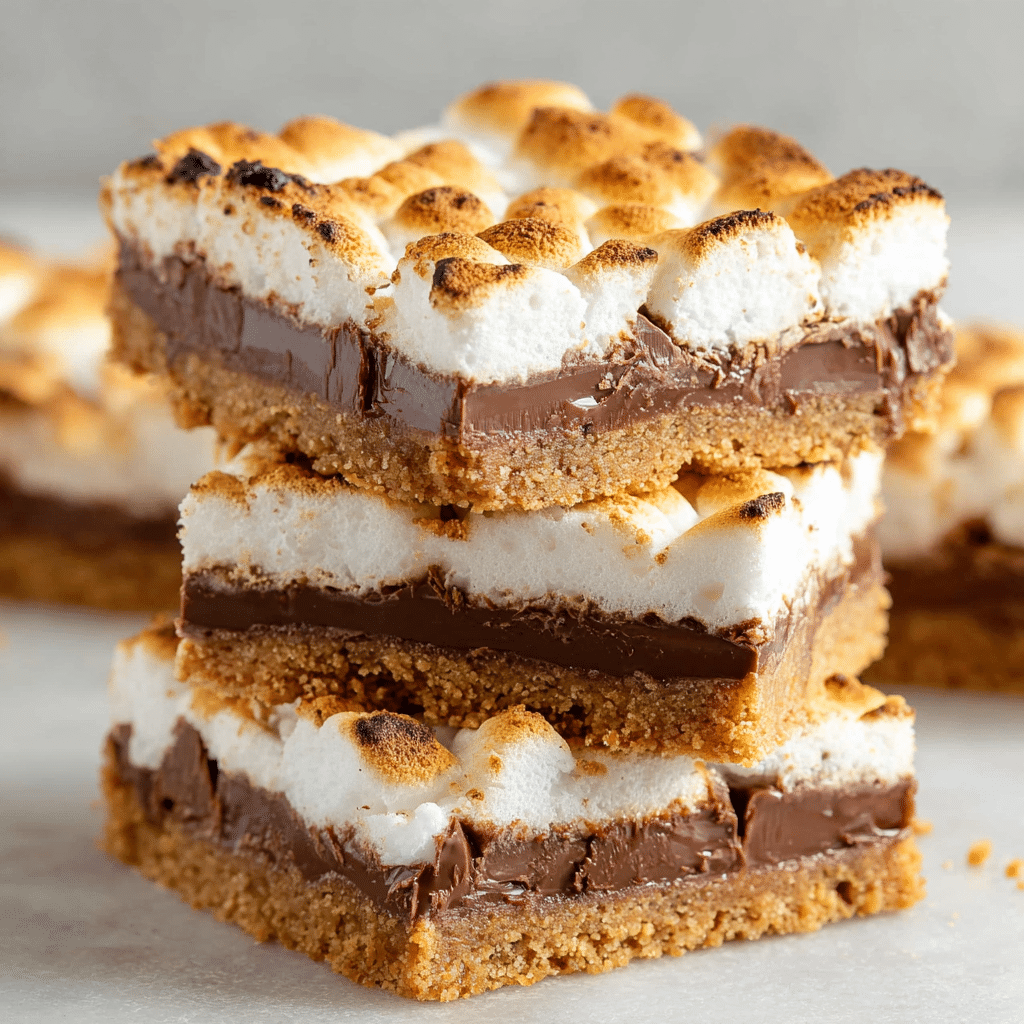
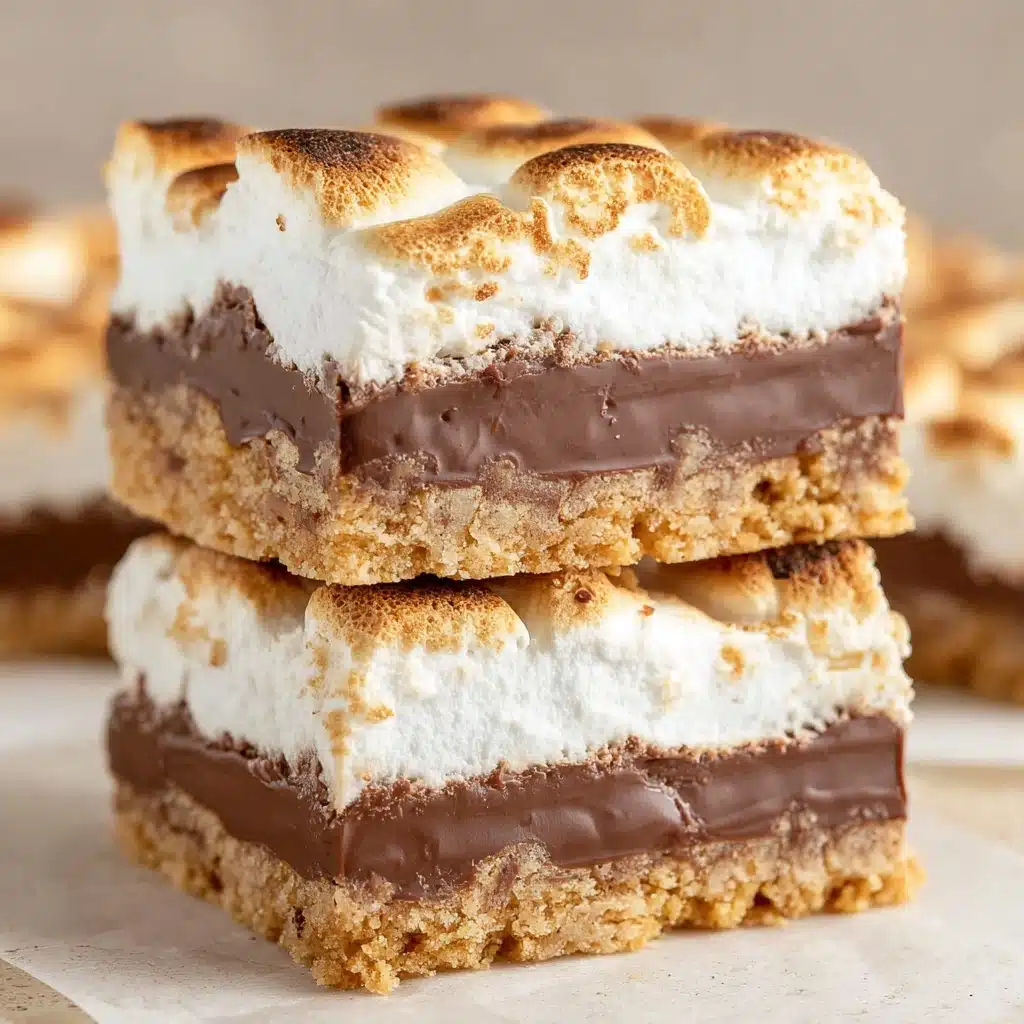
S’mores Bar Recipe
If you are a fan of gooey, chocolatey, marshmallow-loaded treats, then this S’mores Bar Recipe is an absolute must-try. Combining the irresistible crunch of a buttery graham cracker crust with layers of melted Hershey’s chocolate bars and perfectly toasted mini marshmallows, these bars capture the nostalgic magic of classic campfire s’mores all in one easy-to-make dessert. Whether you’re whipping them up for a family gathering or cozying in for a sweet night at home, this recipe delivers both in flavor and fun.
Ingredients You’ll Need
Gathering simple yet essential ingredients is what makes this S’mores Bar Recipe so approachable and delicious. Each component brings something unique to the table — from the buttery graham cracker crust providing crunch, to the chocolate and marshmallow layers that bring gooey sweetness and a perfectly toasted finish.
- 2 Cups graham cracker crumbs: The foundation of the crust, giving that signature honeyed crunch.
- 8-12 Tablespoons butter (melted): Binds the crust together and adds richness; use more for a firmer base.
- 1/2 Cup powdered sugar: Adds a touch of sweetness to the crust without graininess.
- 4 Hershey Chocolate Bars (4.4 ounce bars): Classic milk chocolate that melts beautifully into gooey heaven.
- 1 package mini marshmallows: Small and sweet, perfect for even toasting and layering on top.
How to Make S’mores Bar Recipe
Step 1: Preheat and Prepare
Start by heating your oven to 350 degrees Fahrenheit and greasing a 9×13-inch pan with non-stick butter spray. This prep ensures your bars won’t stick and your crust can bake to a pleasant golden finish.
Step 2: Mix the Crust
In a medium bowl, combine the graham cracker crumbs, powdered sugar, and melted butter. Stir together with a spoon until the mixture is fully incorporated; this mixture will be soft but packable. The right balance of butter is key here—too little and the crust won’t stick together; too much and it becomes greasy.
Step 3: Press and Bake the Crust
Press the graham cracker mixture evenly into the bottom and slightly up the sides of your prepared pan, packing it firmly with your fingers. Bake for about 5 to 8 minutes, or until the edges just begin to brown. This brief bake helps set the crust firmly.
Step 4: Cool and Add Chocolate
Once the crust is baked, remove it from the oven and let it cool slightly. Then, lay the Hershey bars over the cooled crust, covering it as evenly as possible. Return the pan to the oven for about 3 minutes to let the chocolate soften and become shiny but not fully melted.
Step 5: Toast the Marshmallows
After letting the chocolate cool for a minute or two, pack the mini marshmallows tightly over the top. Switch your oven to the broil setting, then place the pan in the oven while watching closely. It only takes about 2 minutes for the marshmallows to brown beautifully, but watch carefully so they don’t burn or catch fire. Once toasted to your liking, take the pan out immediately.
Step 6: Chill and Cut
Allow the bars to cool completely. For easier slicing, pop the pan into the refrigerator to help the layers set firmly. When cutting, warm a sharp knife under hot water, dry it, and slice carefully — repeat warming the knife if it starts getting sticky.
How to Serve S’mores Bar Recipe
Garnishes
Sprinkle a light dusting of powdered sugar over the cooled bars for a delicate, snowy effect. You can also drizzle melted chocolate or caramel for an extra decadent touch that makes your serving presentation truly pop.
Side Dishes
Pair your s’mores bars with a scoop of rich vanilla ice cream or a cup of freshly brewed coffee for a delightful contrast of warm and cold. For gatherings, fresh berries or a bowl of whipped cream make lovely accompaniments too!
Creative Ways to Present
Try serving the s’mores bars on a rustic wooden board for a cozy, campfire vibe at home. Layer individual portions in clear jars or mini mason jars for a playful twist perfect for parties or kids’ treats. You can even toast the marshmallows individually on skewers for a DIY s’mores assembly line!
Make Ahead and Storage
Storing Leftovers
Keep any leftover bars in an airtight container at room temperature for up to two days to maintain that perfect chewy texture. If your kitchen is warm, refrigeration can help extend freshness but may firm up the chocolate and marshmallow layers.
Freezing
You can freeze the bars wrapped tightly in plastic wrap and then foil for up to two months. Thaw them overnight in the fridge before serving, and optionally warm them slightly in the microwave to bring back that freshly toasted softness.
Reheating
To revive the warm, gooey magic, pop individual bars in the microwave for 10-15 seconds or place them in a warm oven (around 300 degrees Fahrenheit) for a few minutes. Keep a close eye to avoid melting or burning the marshmallows again.
FAQs
Can I use other types of chocolate instead of Hershey bars?
Absolutely! Milk chocolate is classic for s’mores, but you can experiment with dark or white chocolate for a different flavor profile. Just make sure it melts well and complements the sweetness of the marshmallows.
How do I prevent marshmallows from burning while broiling?
Keep a close eye on them while broiling because they toast very quickly. It helps to keep the oven rack further from the broiler or to open the oven door several inches to reduce the heat intensity, so you get that perfect golden brown rather than black char.
Is it possible to make these bars gluten-free?
Yes! Simply swap the graham cracker crumbs for a gluten-free alternative, such as gluten-free graham crackers or crushed gluten-free cookies, and double-check all other ingredients for gluten content.
Can this recipe be doubled or halved easily?
Definitely. This recipe scales well, but if you double it, use a larger pan and adjust baking times accordingly. For half the recipe, a smaller pan or a loaf pan will work perfectly with slightly shortened baking times.
What’s the best way to cut sticky s’mores bars neatly?
Warming your knife under hot water and drying it thoroughly before slicing is a pro tip to avoid sticking. Repeat as needed for clean, effortless cuts every time.
Final Thoughts
This S’mores Bar Recipe is the ultimate indulgence that brings the warmth and nostalgia of campfires right into your kitchen. It’s a simple, fun treat that’s sure to impress and satisfy anyone craving that perfect blend of crunchy, melty, and toasty goodness. Give this recipe a whirl, and I promise it’ll become a favorite in your dessert rotation!
PrintS’mores Bar Recipe
This delicious S’mores Bar recipe combines the classic flavors of graham crackers, melted chocolate, and toasted marshmallows in an easy-to-make baked dessert bar. Perfect for gatherings or a sweet treat, these bars have a crunchy graham crust topped with melted Hershey’s chocolate and golden marshmallows toasted to perfection.
- Prep Time: 15 minutes
- Cook Time: 15 minutes
- Total Time: 30 minutes
- Yield: 12 servings 1x
- Category: Dessert
- Method: Baking and Broiling
- Cuisine: American
- Diet: Vegetarian
Ingredients
Crust
- 2 Cups graham cracker crumbs
- 8–12 Tablespoons butter, melted
- 1/2 Cup powdered sugar
Topping
- 4 Hershey Chocolate Bars (4.4 ounce bars each)
- 1 package mini marshmallows
Instructions
- Preheat: Preheat your oven to 350 degrees Fahrenheit to prepare for baking the crust.
- Grease pan: Grease a 9×13 inch baking pan thoroughly with non-stick butter spray to prevent sticking.
- Mix crust ingredients: In a medium bowl, combine the graham cracker crumbs, powdered sugar, and melted butter. Stir until well combined to form a crumbly mixture.
- Press crust: Evenly distribute the crumb mixture into the bottom and sides of the prepared pan. Press firmly with your fingers to pack it tightly as this will form the base of your bars.
- Bake crust: Bake the crust in the oven for about 5-8 minutes until the edges are lightly golden. The crust will harden as it cools.
- Cool crust: Remove the pan from the oven and allow the crust to cool completely before adding toppings.
- Layer chocolate: Place the Hershey chocolate bars over the cooled crust, covering it as evenly as possible.
- Melt chocolate: Return the pan to the oven for approximately 3 minutes until the chocolate starts to melt and becomes shiny.
- Cool slightly: Let the pan cool for 1-2 minutes to slightly set the chocolate.
- Add marshmallows: Arrange mini marshmallows closely packed on top of the melted chocolate layer, covering the surface.
- Broil marshmallows: Set your oven to broil and place the pan on the top rack. Watch carefully and broil for about 2 minutes or until the marshmallows turn golden brown and toasted. Be vigilant to avoid burning or fire.
- Cool completely: Remove from the oven and let the bars cool completely. For easier cutting, you can refrigerate the bars to help them set further.
- Serve: Use a sharp knife warmed under hot water and dried before slicing to cut the bars without sticking. Repeat warming the knife as needed for clean cuts. Serve and enjoy!
Notes
- Use melted butter measured between 8 to 12 tablespoons depending on how firm or crumbly you want the crust.
- The crust hardens as it cools after baking, so press firmly when forming the base.
- Watch marshmallows carefully during broiling to prevent burning or fire hazards.
- Refrigerating the bars after cooling helps them set and makes cutting easier.
- Warming and drying the knife between slices helps prevent sticky messes when cutting the s’mores bars.
Nutrition
- Serving Size: 1 bar (approximately 2 x 3 inches)
- Calories: 320
- Sugar: 25g
- Sodium: 120mg
- Fat: 18g
- Saturated Fat: 11g
- Unsaturated Fat: 6g
- Trans Fat: 0.2g
- Carbohydrates: 35g
- Fiber: 1g
- Protein: 3g
- Cholesterol: 30mg
Keywords: s’mores bars, s’mores recipe, summer dessert, campfire dessert, chocolate marshmallow bars, no campfire s’mores, baked s’mores


