Checkerboard Cookies Recipe
Introduction
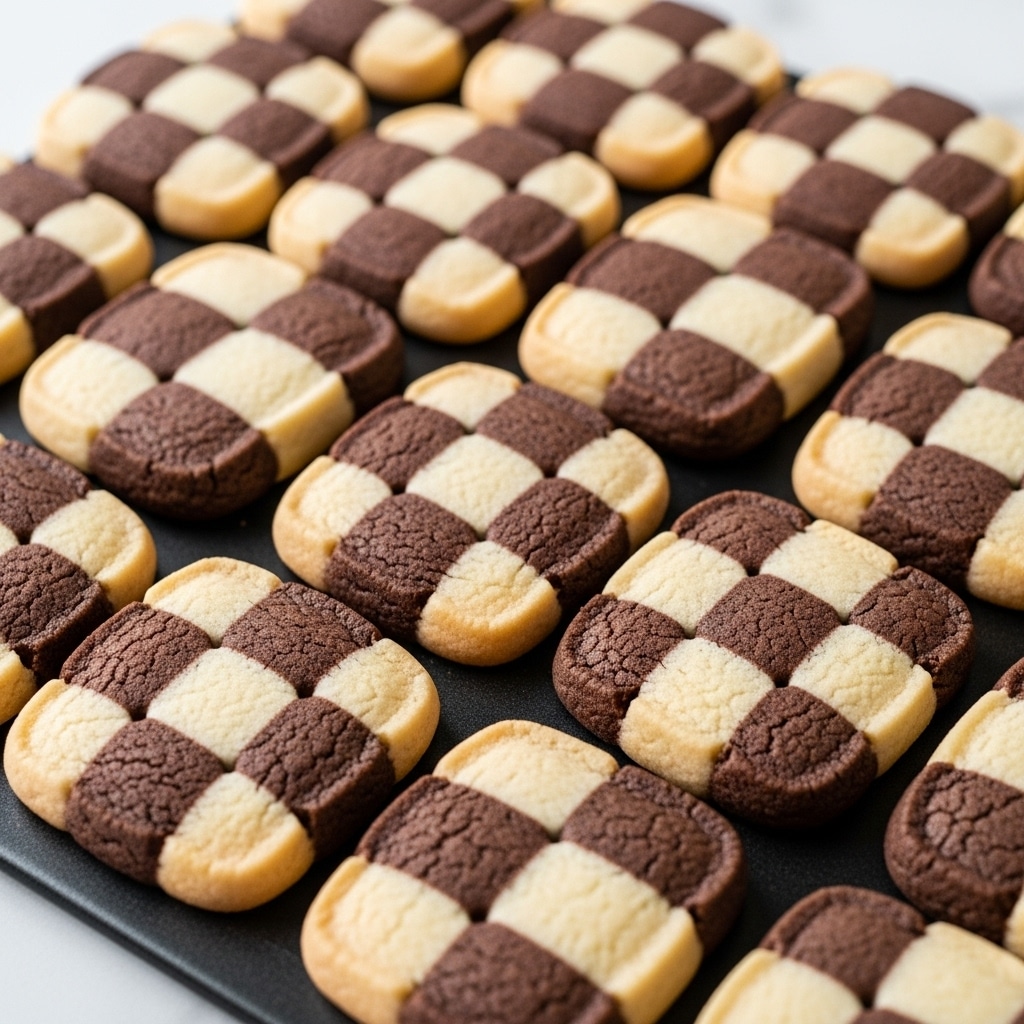
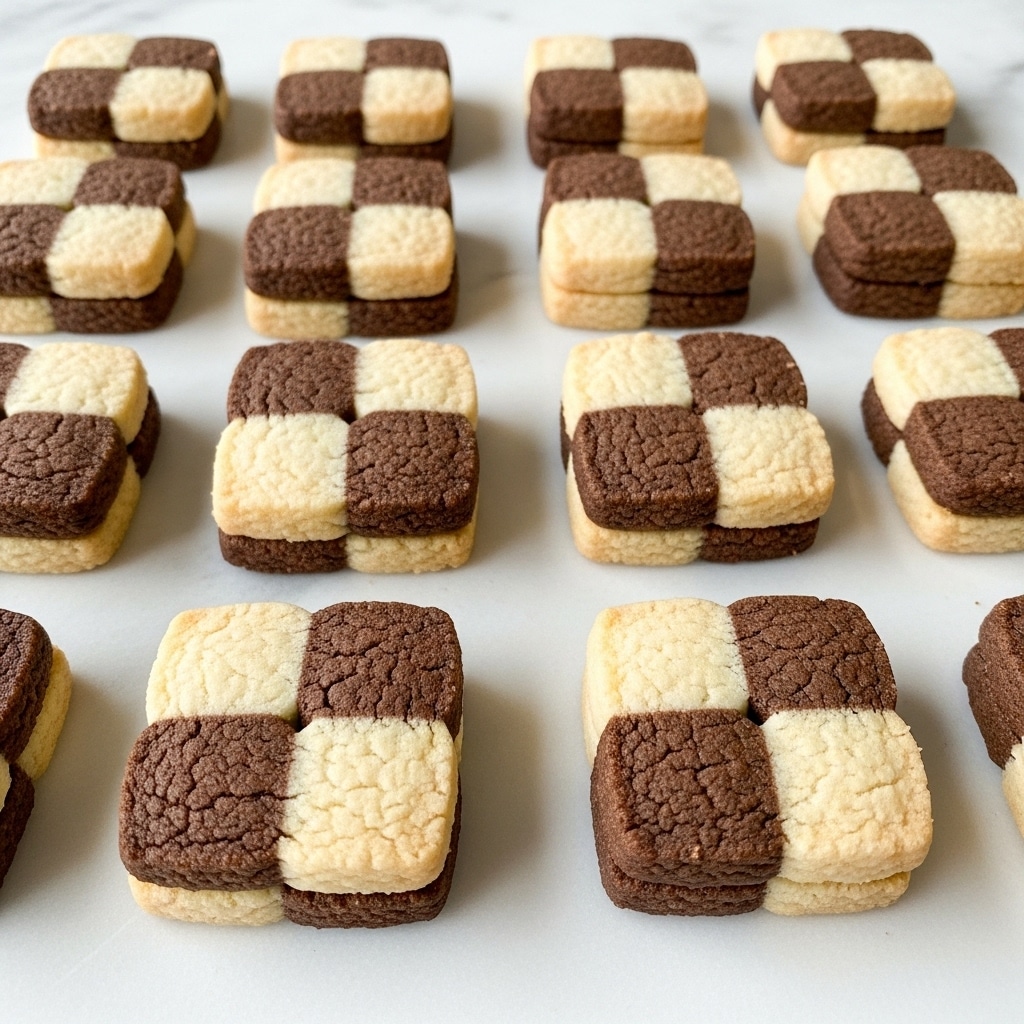
Checkerboard cookies are a classic treat that combines rich vanilla and chocolate dough in a striking pattern. These buttery, tender cookies are as fun to make as they are delicious to eat—perfect for sharing or special occasions.
Ingredients
- 3 1/4 cups (390 g) all-purpose flour
- 1 tsp baking powder
- 1/2 tsp kosher salt
- 1 cup (2 sticks) unsalted butter, softened
- 1 cup (200 g) granulated sugar
- 1 large egg
- 1 large egg yolk
- 1 tsp pure vanilla extract
- 1/4 cup (20 g) unsweetened cocoa powder
Instructions
- Step 1: In a large bowl, whisk together the flour, baking powder, and salt. In a stand mixer fitted with the paddle attachment (or using an electric mixer), beat the butter and sugar on medium-high speed until creamy. Add the egg and egg yolk and beat until fully incorporated. Scrape down the sides, then mix in the vanilla extract. Gradually add the dry ingredients and beat just until combined.
- Step 2: Transfer half of the dough onto a work surface. To the remaining dough in the bowl, add the cocoa powder and beat lightly until just combined.
- Step 3: Shape each half of dough into rectangles about 2 inches tall and wide, and approximately 5 inches long, making them as similar in size and shape as possible. Wrap each rectangle tightly in plastic wrap and refrigerate for at least 1 hour or up to 2 days.
- Step 4: Cut each dough log lengthwise into thirds. Then cut each piece lengthwise into thirds again, resulting in 9 long strips per dough half. Trim any rounded edges for neat squares.
- Step 5: Arrange strips in a checkerboard pattern by placing a vanilla strip, then a chocolate strip, then another vanilla strip side by side. For the next row, stack chocolate, vanilla, and chocolate strips on top, and repeat with a third row of vanilla, chocolate, and vanilla strips. Make a second dough block starting with chocolate strips first. Wrap both blocks tightly and chill for at least 1 hour or up to 2 days.
- Step 6: Preheat the oven to 350°F (175°C). Line two baking sheets with parchment paper. Slice the dough blocks into 1/3-inch thick squares and arrange them on the prepared sheets, spacing them evenly.
- Step 7: Bake for 10 to 12 minutes, until the edges just start to turn golden and the centers feel set. Remove from the oven and let the cookies cool completely on wire racks.
- Step 8: These cookies can be made ahead of time. Store them in an airtight container at room temperature for up to 5 days.
Tips & Variations
- For an extra chocolate kick, add 1/2 teaspoon of instant espresso powder to the cocoa dough.
- If you prefer a softer cookie, reduce baking time by 1-2 minutes, watching carefully.
- Use high-quality vanilla extract for the best flavor.
- For a fun twist, add finely chopped nuts or chocolate chips to the dough before shaping.
Storage
Store checkerboard cookies in an airtight container at room temperature for up to 5 days. To keep them fresh longer, you can freeze the baked cookies in a sealed container for up to 3 months. Reheat frozen cookies briefly in a warm oven (300°F) for about 5 minutes to restore softness and aroma.
How to Serve
Serve this delicious recipe with your favorite sides.
FAQs
Can I use regular cocoa powder instead of unsweetened?
Yes, but unsweetened cocoa powder is best for balancing sweetness and achieving the classic checkerboard flavor. Using sweetened cocoa powder may alter the taste and texture.
Is it necessary to chill the dough before baking?
Chilling the dough is important to firm up the butter, which helps the cookies keep their shape and makes slicing easier. It also enhances the flavors. So, it’s best not to skip this step.
PrintCheckerboard Cookies Recipe
Checkerboard Cookies are a delightful combination of vanilla and chocolate dough arranged in a striking checkerboard pattern. These classic cookies are buttery, tender, and perfect for gifting or sharing during festive occasions. With a simple mixing, chilling, and baking process, these treats impress both in appearance and taste.
- Prep Time: 25 minutes
- Cook Time: 12 minutes
- Total Time: 1 hour 37 minutes
- Yield: Approximately 36 cookies 1x
- Category: Dessert
- Method: Baking
- Cuisine: American
Ingredients
Dry Ingredients
- 3 1/4 cups (390 g) all-purpose flour
- 1 tsp baking powder
- 1/2 tsp kosher salt
Wet Ingredients
- 1 cup (2 sticks) unsalted butter, softened
- 1 cup (200 g) granulated sugar
- 1 large egg
- 1 large egg yolk
- 1 tsp pure vanilla extract
Additional
- 1/4 cup (20 g) unsweetened cocoa powder
Instructions
- Prepare Dry Ingredients: In a large bowl, whisk together the all-purpose flour, baking powder, and kosher salt until evenly combined.
- Cream Butter and Sugar: In the bowl of a stand mixer fitted with the paddle attachment, or in a large mixing bowl using an electric mixer, beat the softened butter and granulated sugar on medium-high speed until the mixture is creamy and fluffy.
- Add Eggs and Vanilla: Add the egg and egg yolk to the butter-sugar mixture and beat until fully incorporated. Scrape down the sides of the bowl, then beat in the pure vanilla extract until combined.
- Combine Wet and Dry Ingredients: Add the dry flour mixture to the wet ingredients and mix on low speed until just combined to form the dough.
- Divide and Flavor Dough: Transfer half of the dough onto a work surface. To the remaining dough in the bowl, add the unsweetened cocoa powder and beat gently until evenly blended.
- Shape Dough into Rectangles: Shape each half of the dough (vanilla and chocolate) into rectangles approximately 2 inches tall and wide, and about 5 inches long. Ensure both rectangles are as similar in size and shape as possible. Wrap each in plastic wrap and refrigerate until chilled, at least 1 hour or up to 2 days.
- Cut Dough into Strips: Remove dough from fridge and cut each rectangle into thirds lengthwise, then cut each resulting piece into thirds lengthwise again, yielding 9 long strips from each block. Trim any rounded edges to have perfect straight squares.
- Assemble Checkerboard Pattern: On a work surface, place one strip of vanilla dough, then a chocolate strip, then another vanilla strip side by side. Stack a second row on top with chocolate, vanilla, and chocolate strips. Complete with a third row of vanilla, chocolate, and vanilla strips. Repeat the process starting with chocolate strips to form a second block. Wrap both blocks in plastic wrap and refrigerate until chilled, at least 1 hour or up to 2 days.
- Preheat Oven and Prepare Baking Sheets: Preheat your oven to 350°F (175°C). Line two baking sheets with parchment paper to prevent sticking.
- Slice and Bake: Remove the dough blocks from the fridge and cut into 1/3-inch thick squares. Arrange the cookies on the prepared baking sheets with a little space between each.
- Bake Cookies: Bake in the preheated oven for 10 to 12 minutes, or until the cookie edges just start to turn golden and the centers feel set but still tender.
- Cool: Remove the baking sheets from the oven and transfer cookies to wire racks to cool completely before serving.
- Make Ahead and Storage: These cookies can be made up to 5 days in advance. Store cooled cookies in an airtight container at room temperature to maintain freshness.
Notes
- Ensure the dough rectangles are as similar in size as possible to achieve the best checkerboard effect.
- For sharper edges when cutting, chill the dough blocks well before slicing.
- If desired, you can dust the cookies with a light sprinkle of powdered sugar before serving for added presentation.
- Store cookies in an airtight container at room temperature for up to 5 days to keep them fresh.
- Use parchment paper on baking sheets to prevent sticking and make cleanup easier.
Keywords: checkerboard cookies, vanilla chocolate cookies, butter cookies, festive cookies, holiday cookies

