Delicious Apple Pie Jam Recipe Easy Recipe
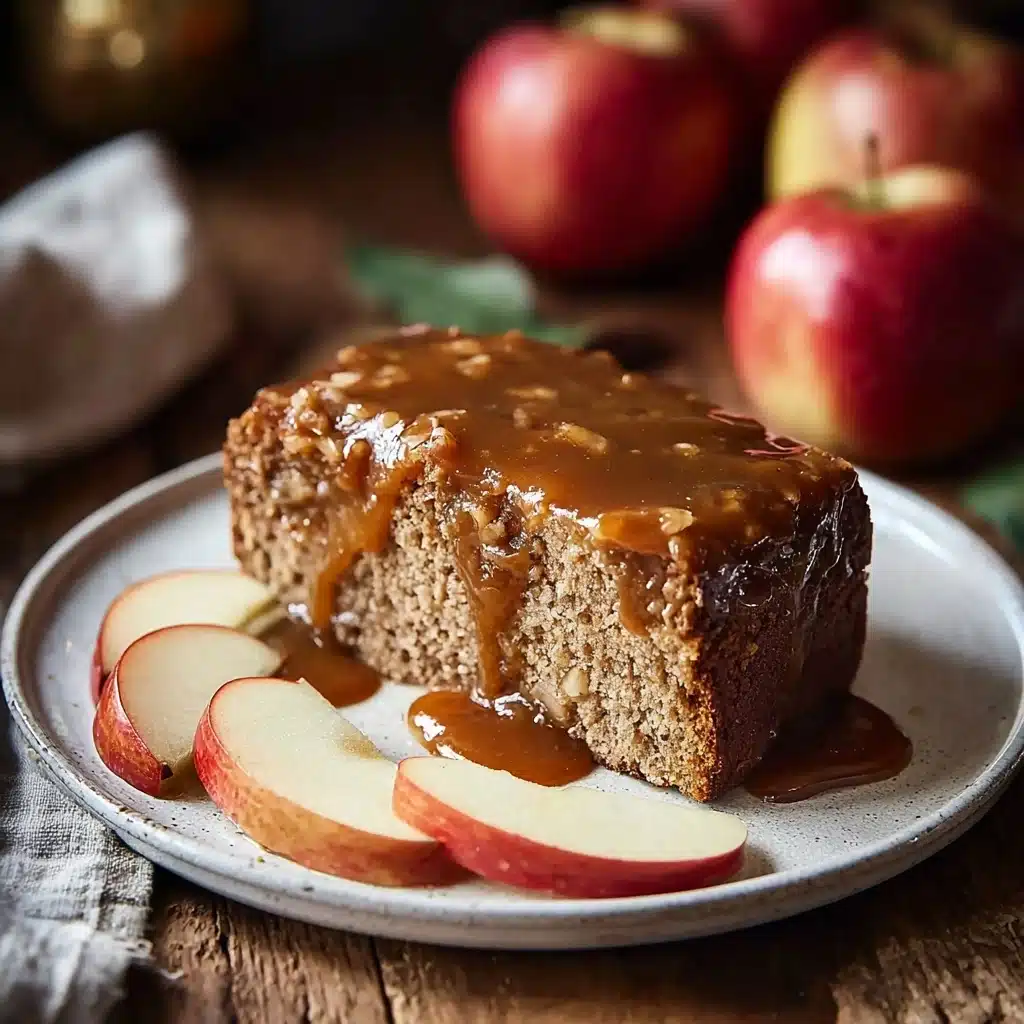
If you have a sweet tooth and love capturing the cozy flavors of fall in a jar, this Delicious Apple Pie Jam Recipe Easy is absolutely perfect for you. Imagine biting into that warm, spiced apple goodness you adore in your pie, now transformed into a luscious, spreadable jam that makes breakfast or snacks so much more exciting. This recipe balances the sweetness of apples with aromatic spices and just a hint of tartness, creating a jam that tastes like a mini apple pie experience every single time.

Ingredients You’ll Need
The beauty of this Delicious Apple Pie Jam Recipe Easy lies in its simplicity and how each ingredient plays a crucial role in bringing that mouthwatering apple pie feeling to your jar. From the crisp apples to the perfectly blended spices, the ingredients work harmoniously to deliver layers of flavor and a delightful texture.
- 6 cups peeled, cored, and finely chopped apples: Fresh apples are the heart of this jam, providing natural sweetness, body, and a bit of texture.
- 4 cups granulated sugar: This gives the jam its classic sweetness and helps with preservation.
- 1 cup packed brown sugar: Adds depth and a lovely caramel undertone reminiscent of baked apples.
- 1½ teaspoons ground cinnamon: The key spice that instantly says ‘apple pie’ and layers complex warmth.
- ½ teaspoon ground nutmeg: Just a whisper of nutmeg brings softness and a little extra spice zing.
- ¼ teaspoon ground allspice: A subtle blend that enhances that homemade, cozy vibe.
- ¼ teaspoon salt: A pinch to balance sweetness and elevate flavors.
- 2 tablespoons lemon juice: Adds brightness and a bit of zing to keep the jam fresh-tasting.
- 1 cup apple cider or apple juice: Provides juiciness and cider’s hint of tartness for complexity.
How to Make Delicious Apple Pie Jam Recipe Easy
Step 1: Prepare Your Equipment and Ingredients
Start by sterilizing your jars and lids by boiling them in water for at least 10 minutes. This essential step ensures your jam stays fresh and safe while sealing beautifully. Meanwhile, peel, core, and finely chop your apples—using fresh, crisp apples will bring the best texture and flavor to your jam.
Step 2: Combine Everything in a Pot
Next, toss your apples, granulated sugar, brown sugar, cinnamon, nutmeg, allspice, salt, lemon juice, and apple cider into a large heavy-bottomed pot. Stir everything together well so that all those sweet spices start to mingle with the fruit juices even before cooking.
Step 3: Cook the Jam
Heat the mixture over medium-high until it reaches a rolling boil, then reduce the heat and let it simmer gently for 30 to 40 minutes. Make sure to stir often to prevent sticking and help the jam thicken evenly. The aroma filling your kitchen will be like walking into an old-fashioned bakery—I promise it’s irresistible!
Step 4: Test for Doneness
To check if your jam has set, place a spoonful on a chilled plate and pop it in your fridge for a minute. If it gels and wrinkles when pushed with a finger, you’re good to go. If it’s still too runny, just simmer a little longer and retest.
Step 5: Jar and Process Your Jam
Ladle the hot jam into your sterilized jars, leaving about ¼-inch headspace at the top. Wipe the rims clean, seal with the lids, and process the jars in a boiling water bath for 10 minutes. This step ensures your jam keeps perfectly for months, ready for whenever you crave that comforting apple pie flavor.
Step 6: Cool and Store
Allow your jars to cool completely on a towel or cooling rack. Once cooled, check that the lids have sealed properly by pressing down in the center. Store your jam in a cool, dark place, and enjoy that amazing apple pie taste any time you want!
How to Serve Delicious Apple Pie Jam Recipe Easy
Garnishes
To elevate your jam experience, try garnishing your serving with a sprinkle of chopped toasted pecans or a cinnamon stick alongside. A light dusting of ground cinnamon on top adds a fresh aromatic touch and hints at the warm spices inside.
Side Dishes
This jam pairs beautifully with buttered toast, warm biscuits, or even dolloped atop vanilla ice cream. It’s a natural companion to cheese boards, especially with creamy brie or sharp cheddar, bringing a delightful sweet-spicy contrast.
Creative Ways to Present
Think outside the toast with this jam by swirling it into yogurt bowls, spooning it onto pancakes or waffles, or even using it as a filling for thumbprint cookies. The possibilities are endless and delicious!
Make Ahead and Storage
Storing Leftovers
If you find yourself with leftover jam after opening a jar, store it in the fridge tightly covered. It will keep fresh and flavorful for up to three weeks—though it’s so delicious, it might not last that long!
Freezing
This jam freezes very well. Transfer portions into freezer-safe containers leaving some space for expansion. Frozen, it will maintain its quality for up to six months, so you have a taste of apple pie anytime you want.
Reheating
When ready to enjoy frozen or refrigerated jam, gently warm it on the stovetop or microwave until spreadable and soft again. Stir well before serving to reincorporate any separated juices for the best texture.
FAQs
Can I use any type of apple for this jam?
Absolutely! While tart varieties like Granny Smith or Fuji provide a perfect balance, a mix of sweet and tart apples will add even more complexity and texture to your jam.
Does this recipe require pectin?
No pectin is needed here. The natural pectin in apples combined with the sugar and cooking time sets this jam to a lovely spreadable consistency.
How long does this jam last when canned properly?
When sealed and stored in a cool, dark place, this jam can last up to a year. Once opened, keep it refrigerated and use within three weeks.
Can I reduce the sugar in this recipe?
While sugar helps with preservation and texture, you can reduce it slightly if you prefer a less sweet jam—but keep in mind that it may affect the final texture and shelf life.
Is this jam suitable for gifting?
Definitely! This Delicious Apple Pie Jam Recipe Easy makes a wonderful homemade gift, especially when presented in cute jars with ribbons and personalized labels.
Final Thoughts
I can’t recommend enough taking the time to make this Delicious Apple Pie Jam Recipe Easy your own—it’s like preserving a spoonful of comfort and nostalgia in every jar. Whether for yourself or as a thoughtful gift, it’s a sweet hug of fall flavors that you’ll come back to again and again. Give it a try today and let your kitchen fill with those warm, inviting aromas that only homemade jam can bring.
PrintDelicious Apple Pie Jam Recipe Easy Recipe

This Delicious Apple Pie Jam combines the warm, comforting flavors of classic apple pie spices with the convenience of a spreadable jam. Made from chopped fresh apples, cinnamon, nutmeg, and a touch of allspice, this easy-to-make jam is perfect for spreading on toast, dolloping on desserts, or gifting to loved ones. The recipe involves simple steps to cook and preserve the jam, making it an ideal homemade treat for apple lovers.
- Prep Time: 20 minutes
- Cook Time: 40 minutes
- Total Time: 1 hour
- Yield: About 5 (8-ounce) jars 1x
- Category: Jam/Preserves
- Method: Boiling and Water Bath Canning
- Cuisine: American
- Diet: Vegetarian
Ingredients
Fruits
- 6 cups peeled, cored, and finely chopped apples (about 6 medium apples)
Sweeteners
- 4 cups granulated sugar
- 1 cup packed brown sugar
Spices & Flavorings
- 1½ teaspoons ground cinnamon
- ½ teaspoon ground nutmeg
- ¼ teaspoon ground allspice
- ¼ teaspoon salt
- 2 tablespoons lemon juice
Liquids
- 1 cup apple cider or apple juice
Instructions
- Sterilize Jars: Boil the jars and lids to sterilize them thoroughly, then keep them warm until you’re ready to use. This prevents contamination and ensures your jam stays fresh.
- Cook Jam: In a large pot, combine the chopped apples, granulated sugar, brown sugar, ground cinnamon, nutmeg, allspice, salt, lemon juice, and apple cider or juice. Stir well to mix all the ingredients. Bring the mixture to a boil over medium-high heat, then reduce to a simmer. Cook for 30 to 40 minutes, stirring frequently, until the jam thickens considerably.
- Test Doneness: To check if the jam is ready, place a spoonful on a chilled plate. Let it sit for a minute. If the jam gels and wrinkles slightly when pushed with your finger, it’s done. If not, continue to simmer, testing every few minutes.
- Jar and Process: Ladle the hot jam into the sterilized jars, leaving about a ¼-inch headspace at the top. Wipe the rims clean to ensure a good seal. Apply the lids, then process the jars in a boiling water bath for 10 minutes to preserve the jam safely.
- Cool and Store: Remove the jars from the water bath and let them cool completely on a towel or rack. Once cool, check the seals to ensure they are secure. Store the sealed jars in a cool, dark place. Refrigerate after opening.
Notes
- Use tart apples like Granny Smith or a mix for a balanced flavor and perfect consistency.
- Ensure jars and lids are properly sterilized to prevent spoilage.
- Adjust sugar quantities slightly depending on the sweetness of your apples and personal preference.
- If you want a smoother texture, you can mash the cooked apples slightly before jarring.
- The jam thickens more as it cools, so avoid overcooking to maintain the right spreadable consistency.
- Store opened jars in the refrigerator and consume within 3 weeks.
Nutrition
- Serving Size: 2 tablespoons (about 30g)
- Calories: 90
- Sugar: 22g
- Sodium: 50mg
- Fat: 0.1g
- Saturated Fat: 0g
- Unsaturated Fat: 0g
- Trans Fat: 0g
- Carbohydrates: 23g
- Fiber: 1g
- Protein: 0.1g
- Cholesterol: 0mg
Keywords: apple pie jam, apple jam recipe, homemade apple jam, easy jam recipe, apple preserves, spiced apple jam, canned apple jam


