Homemade Oreo Cookies Recipe
Introduction
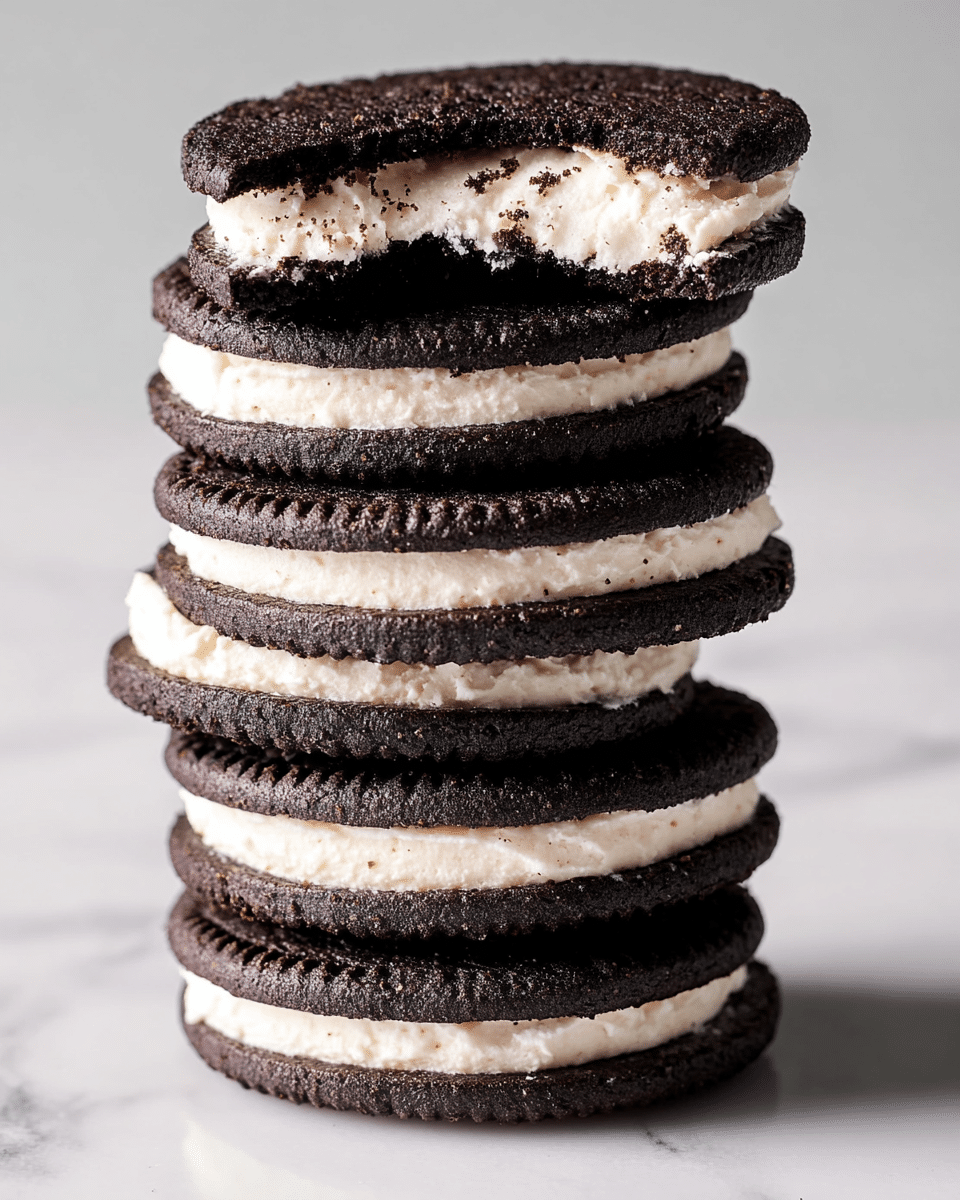
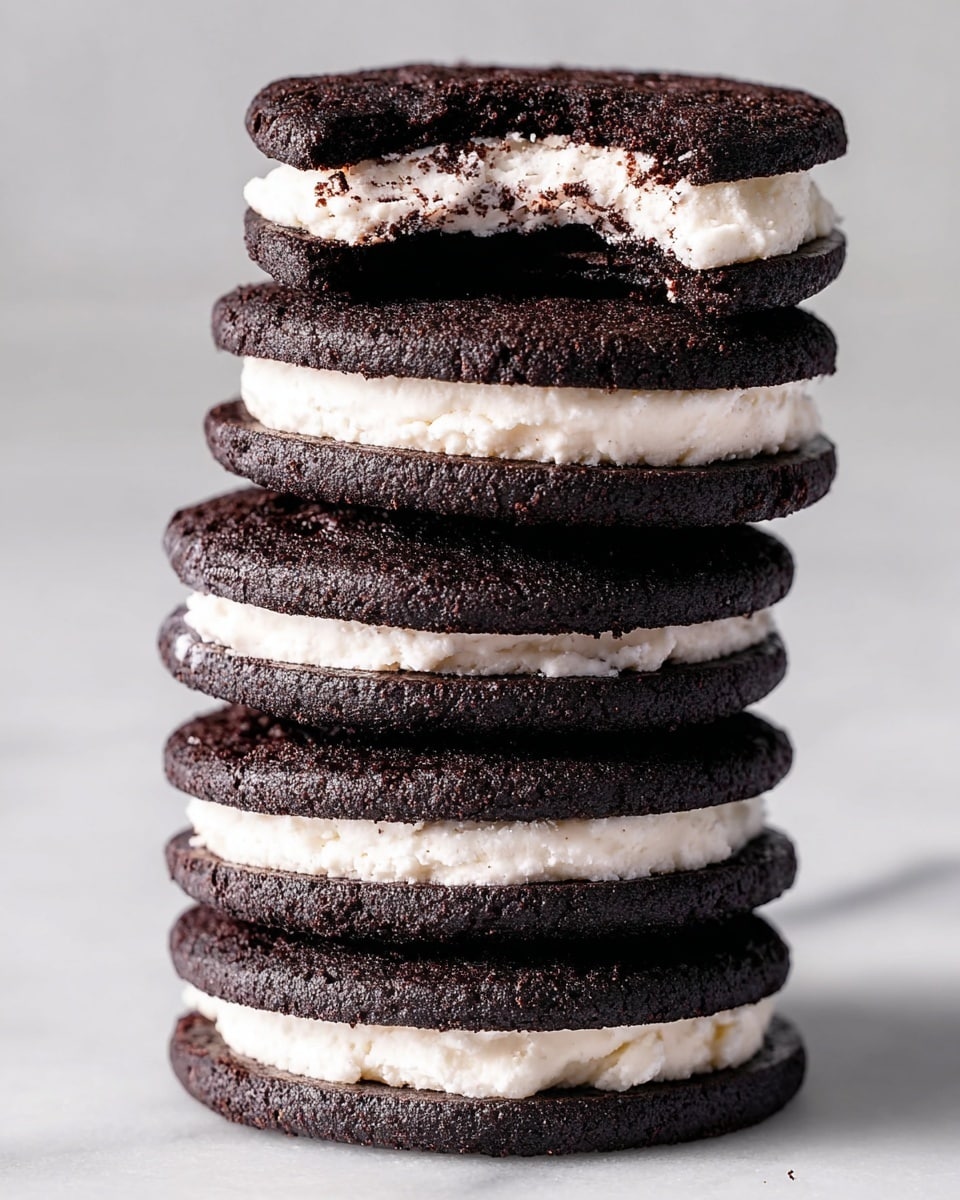
These homemade Oreo cookies capture the nostalgic crunch and creamy filling of the classic treat, made from scratch with simple ingredients. Perfect for baking enthusiasts looking to recreate a beloved favorite right in their own kitchen.
Ingredients
- 1 1/4 cups (159 grams) all-purpose flour
- 1/2 cup (43 grams) Dutch-process cocoa powder or Black cocoa powder
- 1 teaspoon baking soda
- 1/4 teaspoon baking powder
- 1/4 teaspoon fine sea salt
- 1 cup (200 grams) granulated sugar
- 10 tablespoons (142 grams) unsalted butter, at cool room temperature, cut into chunks
- 1 large egg, at room temperature
- 1 stick (113 grams) unsalted butter, at cool room temperature
- 2 ½ teaspoons pure vanilla extract
- 2 1/2 cups (313 grams) powdered sugar, sifted
- 1/8 teaspoon fine sea salt
Instructions
- Step 1: Preheat your oven to 375°F and line two baking sheets with parchment paper.
- Step 2: In a food processor with the S blade, or using an electric mixer with a paddle attachment, combine the flour, cocoa powder, baking soda, baking powder, salt, and granulated sugar.
- Step 3: While pulsing or mixing on low speed, add the butter chunks gradually, then add the egg. Continue until the dough forms a cohesive mass, about 1 minute.
- Step 4: Use a small cookie scoop to portion 1-Tablespoon sized balls of dough onto the prepared sheets, spacing them at least 2 inches apart. Dampen your palm and gently flatten each dough ball to about 1/8-inch thickness.
- Step 5: Chill the trays of flattened dough in the refrigerator for at least 10 minutes before baking.
- Step 6: Bake the cookies for 9 to 10 minutes, rotating the trays once midway for even baking. The cookies should be fragrant and completely set when done. Transfer baking sheets to a rack to cool. Cookies can be stored in an airtight container for up to 2 days but may lose crispiness over time.
- Step 7: To make the filling, beat the butter and vanilla in a stand mixer on medium-low speed until well combined. Scrape down the bowl, then gradually add powdered sugar and salt.
- Step 8: Increase the mixer speed to high and beat for 2–3 minutes until the filling is light and fluffy.
- Step 9: Assemble the cookies by piping or spreading about a teaspoon of filling onto the center of one cookie. Sandwich with another cookie of equal size and gently press to spread the filling evenly.
- Step 10: Serve the cookies the same day for the best texture and flavor.
Tips & Variations
- For an extra intense chocolate flavor, use black cocoa powder instead of Dutch-process cocoa powder.
- Chilling the dough before baking helps maintain the cookie shape and prevents spreading.
- Use a small offset spatula or piping bag for easier and neater filling assembly.
- To customize, add a pinch of instant coffee powder to deepen the chocolate taste.
- Store assembled cookies in a single layer to prevent sticking and preserve crispiness.
Storage
Store baked cookies in an airtight container at room temperature for up to 2 days. Keep the filling and cookies separate if you want to maintain the crisp texture longer. When ready to serve, assemble and enjoy immediately. Reheat assembled cookies in a warm oven briefly if desired, but avoid microwaving to keep the cookie crisp.
How to Serve
Serve this delicious recipe with your favorite sides.
FAQs
Can I use regular cocoa powder instead of Dutch-process?
Yes, you can substitute regular cocoa powder, but the flavor will be slightly different, often less smooth and rich than with Dutch-process or black cocoa powder.
How do I make the cookies crisp?
Flatten the dough thinly and chill before baking. Bake until the edges are set and allow to cool completely. Avoid storing assembled cookies for too long, as the filling can soften the cookie exterior.
PrintHomemade Oreo Cookies Recipe

Homemade Oreo Cookies featuring rich, chocolatey sandwich cookies with a creamy vanilla filling. These classic treats are made from scratch with cocoa-infused cookie dough and a smooth, fluffy buttercream filling, perfect for satisfying your sweet tooth with a nostalgic favorite.
- Prep Time: 20 minutes
- Cook Time: 10 minutes
- Total Time: 30 minutes
- Yield: About 30 sandwich cookies (60 individual cookie discs) 1x
- Category: Dessert
- Method: Baking
- Cuisine: American
Ingredients
Cookie Dough
- 1 1/4 cups (159 grams) all-purpose flour
- 1/2 cup (43 grams) Dutch-process cocoa powder or Black cocoa powder
- 1 teaspoon baking soda
- 1/4 teaspoon baking powder
- 1/4 teaspoon fine sea salt
- 1 cup (200 grams) granulated sugar
- 10 tablespoons (142 grams) unsalted butter, at cool room temperature, cut into chunks
- 1 large egg, at room temperature
Filling
- 1 stick (113 grams) unsalted butter, at cool room temperature
- 2 1/2 teaspoons pure vanilla extract
- 2 1/2 cups (313 grams) powdered sugar, sifted
- 1/8 teaspoon fine sea salt
Instructions
- Make the cookie dough: Preheat the oven to 375°F and line two baking sheets with parchment paper. In a food processor with the S blade or a stand mixer with the paddle attachment, combine the flour, cocoa powder, baking soda, baking powder, salt, and granulated sugar.
- Add butter and egg: While pulsing or mixing on low speed, add the butter pieces in several additions, then add the egg. Continue mixing until the dough forms a cohesive mass, about 1 minute.
- Shape cookies: Using a small cookie scoop, portion the dough into 1 tablespoon sized balls, placing them at least 2 inches apart on the prepared baking sheets. Dampen your palm and gently flatten each ball to about 1/8-inch thickness.
- Chill the dough: Chill the trays of flattened dough in the refrigerator for at least 10 minutes to help maintain their shape during baking.
- Bake cookies: Bake for 9 to 10 minutes, rotating the trays once halfway through for even baking, until cookies are fragrant and set. Transfer the cookies to a rack to cool completely. Cookies can be stored airtight for up to 2 days but may lose crispiness.
- Prepare the filling: In a stand mixer with the paddle attachment, beat the butter and vanilla on medium-low until combined. Scrape down the bowl, then gradually add the sifted powdered sugar followed by the salt. Increase speed to high and beat for 2 to 3 minutes until the filling is light and fluffy.
- Assemble the cookies: Using a pastry bag or spatula, place a teaspoon-sized dollop of filling onto the center of one cookie. Top with another cookie of similar size. Lightly press to spread the filling evenly to the edges. Repeat with remaining cookies and filling.
- Serve: For best texture, serve the cookies on the same day they are assembled.
Notes
- Use either Dutch-process or Black cocoa powder for a deep, authentic color and flavor.
- Dampening your hand before flattening prevents dough from sticking and helps achieve an even thickness.
- Chilling the dough before baking helps cookies keep their shape and enhances texture.
- Cookies become less crispy the longer they are stored; enjoy them fresh for optimal crunch.
- You can store baked cookies airtight for up to 2 days before filling.
- For easier assembly, chill the filling slightly if too soft.
- If you don’t have a food processor, use a mixer and mix carefully until the dough forms.
Keywords: Homemade Oreo, chocolate sandwich cookies, Oreo copycat recipe, chocolate cookies with cream filling, classic cookies, DIY Oreos


