Instant Pot Garlic Herb Chicken Thighs Recipe
Introduction
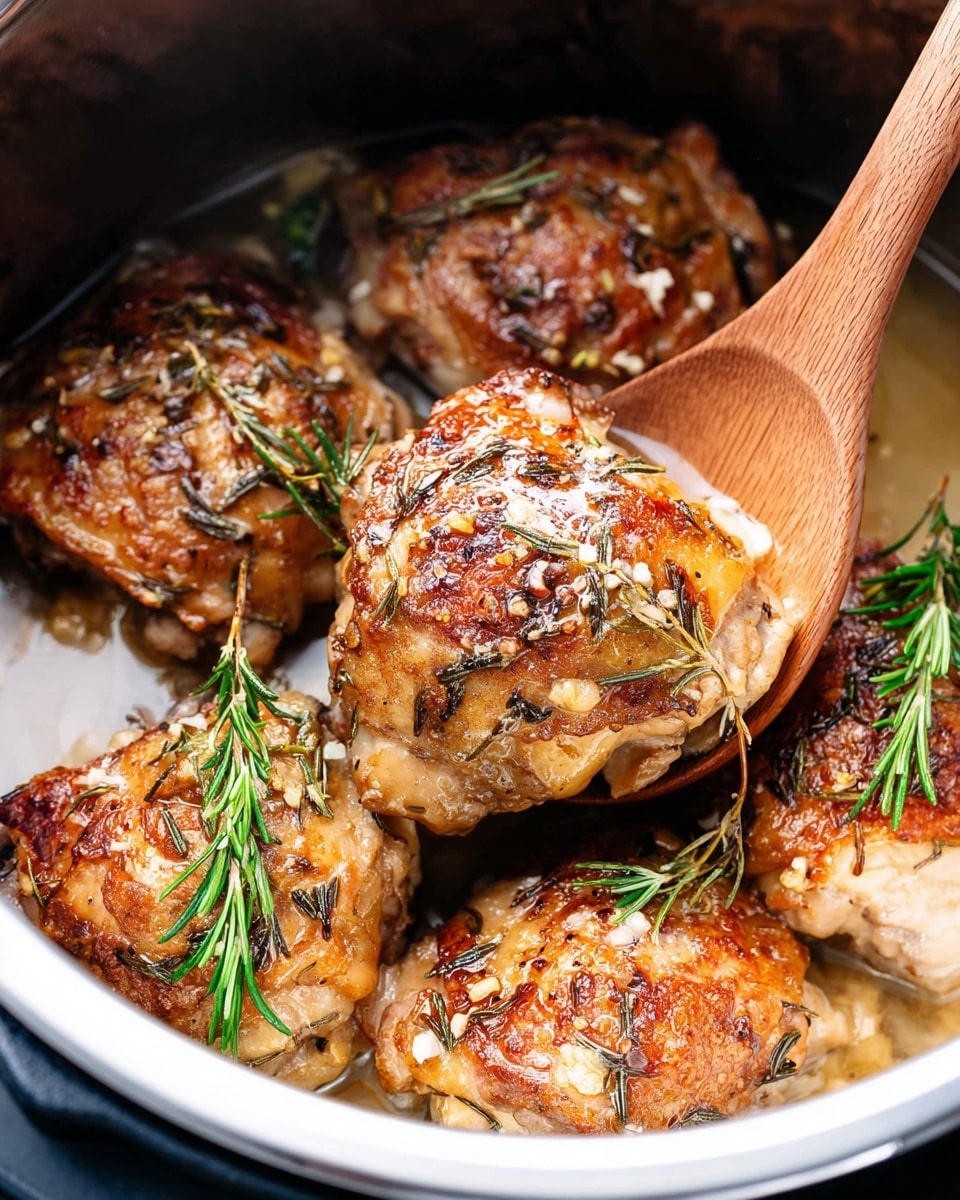
This Instant Pot chicken thighs recipe delivers tender, juicy meat with crispy skin and a flavorful garlic butter sauce. It’s an easy way to enjoy a classic comfort meal with minimal hands-on time, perfect for busy weeknights or special dinners.
Ingredients
- 2 lb bone-in skin-on chicken thighs (or boneless chicken thighs if you prefer)
- 1 tsp sea salt
- 1/4 tsp black pepper
- 1/2 tsp paprika
- 1 tbsp olive oil
- 1 cup chicken broth (reduced sodium)
- 3 tbsp unsalted butter (melted)
- 1 tbsp lemon juice
- 4 cloves garlic (minced)
- 1 tbsp fresh thyme leaves
- 1 tbsp fresh rosemary (chopped)
- 1 tbsp arrowroot powder (or cornstarch, or 1/4 tsp xanthan gum)
Instructions
- Step 1: Pat the chicken dry with a paper towel. Season both sides with salt, pepper, and paprika.
- Step 2: Heat olive oil in the Instant Pot on the Saute setting until shimmering. Add the chicken thighs in a single layer and sear for 3-4 minutes per side until browned. Work in batches if needed. Remove chicken and set aside.
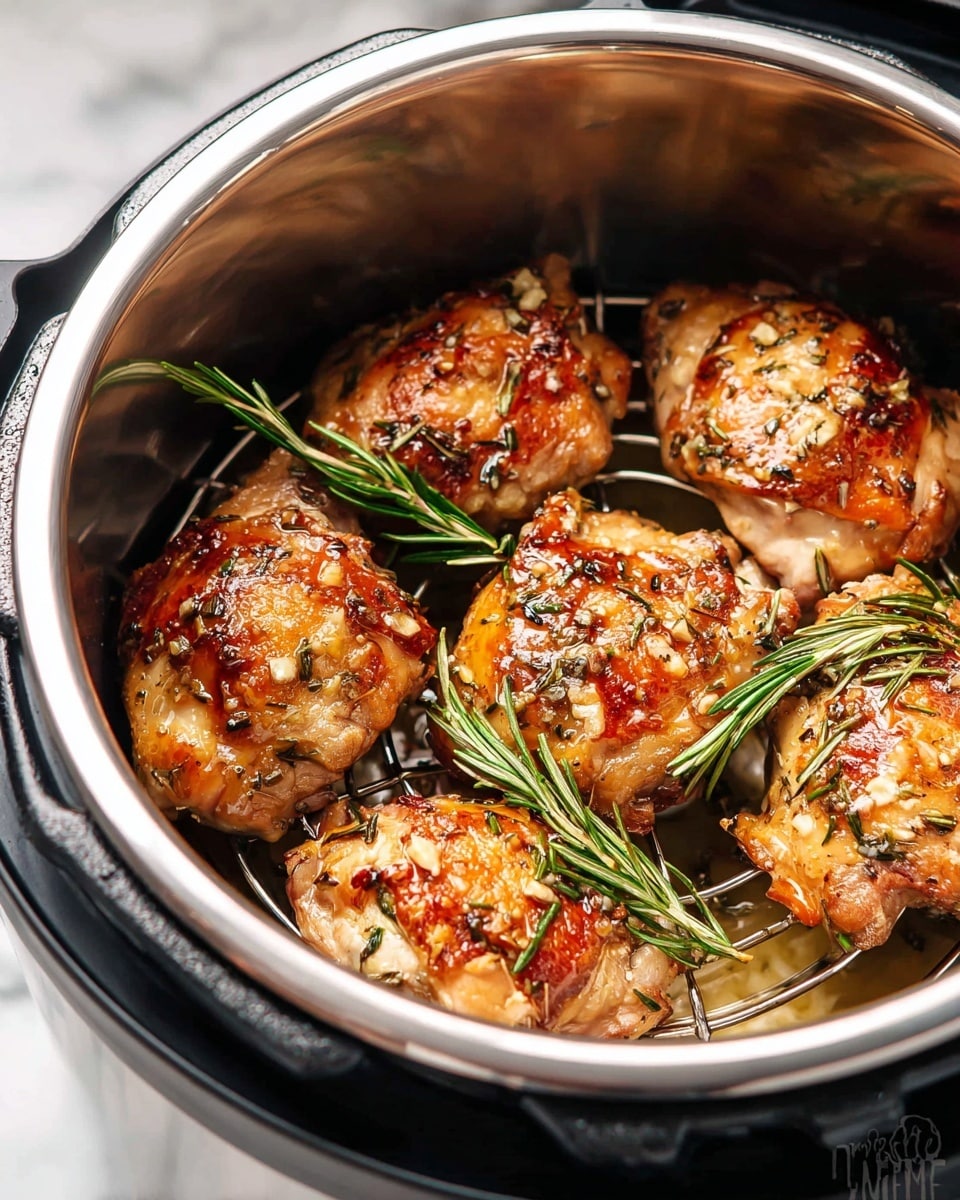
- Step 3: Pour chicken broth into the bottom of the Instant Pot. Place the trivet inside and arrange the chicken thighs skin side up on it.
- Step 4: In a small bowl, whisk melted butter, lemon juice, minced garlic, thyme, and rosemary. Pour evenly over the chicken, keeping most on the meat rather than falling to the bottom.
- Step 5: Cover with the lid, set the valve to Sealing. Pressure cook on High for 10 minutes for bone-in thighs or 8 minutes for boneless. After cooking, allow a natural pressure release for 5 minutes, then manually release the remaining pressure.
- Step 6: Preheat the oven to Broil. Transfer chicken thighs to a baking sheet, skin side up, and broil for 2-3 minutes to crisp the skin.
- Step 7: (Optional) For thicker sauce, remove the trivet. Mix a few tablespoons of pot liquid with arrowroot powder (or substitute) in a small bowl. Return mixture to the Instant Pot and simmer on Saute for 5 minutes until thickened.
- Step 8: Serve the chicken thighs with the garlic butter sauce from the pot.
Tips & Variations
- Use boneless thighs for quicker cooking and easier eating, but bone-in offers more flavor.
- Fresh herbs add brightness, but dried thyme and rosemary can be used in a pinch (use about one-third the amount).
- For extra crispy skin, pat the chicken very dry before searing and broiling.
- Substitute lemon juice with a splash of white wine vinegar for a different tangy twist.
Storage
Store leftover chicken and sauce in an airtight container in the refrigerator for up to 3 days. Reheat gently in a skillet or microwave to preserve juiciness, and avoid overcooking. The sauce can be warmed separately and poured over the chicken.
How to Serve
Serve this delicious recipe with your favorite sides.
FAQs
Can I use boneless chicken thighs instead of bone-in?
Yes, boneless thighs work well and cook slightly faster; reduce pressure cooking time to 8 minutes. The flavor may be a bit less rich but still delicious.
How do I get the chicken skin crispy after pressure cooking?
After pressure cooking, broil the chicken on a baking sheet skin side up for 2-3 minutes. Keep a close eye to prevent burning and achieve a nicely crisped skin.
PrintInstant Pot Garlic Herb Chicken Thighs Recipe

This Instant Pot Chicken Thighs recipe delivers tender, juicy chicken with a flavorful garlic butter sauce. The chicken is first seared in the Instant Pot for a golden crust, then pressure cooked to perfection, and finally broiled briefly to crisp the skin. Enhanced with fresh herbs, lemon, and garlic, this dish is simple yet elegant and perfect for a quick weeknight dinner or a special meal.
- Prep Time: 10 minutes
- Cook Time: 25 minutes (including searing, pressure cooking, and broiling)
- Total Time: 35 minutes
- Yield: 4 servings 1x
- Category: Main Course
- Method: Instant Pot
- Cuisine: American
- Diet: Halal
Ingredients
Chicken and Seasoning
- 2 lb Bone-in skin-on chicken thighs (or boneless chicken thighs if you prefer)
- 1 tsp Sea salt
- 1/4 tsp Black pepper
- 1/2 tsp Paprika
Cooking Liquids and Sauce
- 1 tbsp Olive oil
- 1 cup Chicken broth (reduced sodium)
- 3 tbsp Unsalted butter (melted)
- 1 tbsp Lemon juice
- 4 cloves Garlic (minced)
- 1 tbsp Fresh thyme leaves
- 1 tbsp Fresh rosemary (chopped)
- 1 tbsp Arrowroot powder (or cornstarch or 1/4 tsp xanthan gum)
Instructions
- Season the chicken: Pat the chicken thighs dry using a paper towel. Season both sides evenly with sea salt, black pepper, and paprika to enhance flavor.
- Sear the chicken: Turn the Instant Pot on to the Saute setting and heat the olive oil until shimmering. Add the chicken thighs in a single layer and sear for 3-4 minutes per side until they develop a browned crust. Remove the chicken and set aside, turning off the heat.
- Add broth and arrange chicken: Pour the chicken broth into the Instant Pot’s bottom. Place the trivet inside and arrange the seared chicken thighs skin-side up on the trivet.
- Prepare the sauce: In a small bowl, whisk together the melted butter, lemon juice, minced garlic, fresh thyme leaves, and chopped rosemary. Pour this mixture evenly over the chicken thighs, aiming to keep most on the chicken.
- Pressure cook the chicken: Secure the lid on the Instant Pot and turn the valve to Sealing. Set to cook on High pressure for 10 minutes if using bone-in thighs, or 8 minutes if using boneless. The pot will take 7-8 minutes to come to pressure before the countdown begins. When cooking is complete, allow a natural pressure release for 5 minutes, then manually release the remaining pressure.
- Broil to crisp the skin: While the pressure is naturally releasing, preheat your oven’s broiler. Transfer the chicken thighs to a baking sheet, skin side up, and broil for 2-3 minutes until the skin crisps beautifully.
- Thicken the sauce (optional): Remove the trivet from the Instant Pot. Take a few tablespoons of the cooking liquid and mix it with the arrowroot powder (or cornstarch or xanthan gum) in a small bowl. Return this mixture to the pot, set to Saute, and simmer for about 5 minutes until the sauce thickens.
- Serve: Plate the crispy chicken thighs and spoon the garlic butter herb sauce from the Instant Pot over them for a delicious finish.
Notes
- You can substitute boneless chicken thighs for convenience; adjust pressure cooking to 8 minutes accordingly.
- Broiling at the end crisps up the skin and adds a wonderful texture contrast.
- Arrowroot powder, cornstarch, or xanthan gum all work as thickening agents; choose based on dietary needs or availability.
- For less sodium, use reduced sodium chicken broth or homemade broth.
- Leftover chicken keeps well refrigerated for 3-4 days and reheats nicely without drying out.
Keywords: Instant Pot Chicken Thighs, Pressure Cooker Chicken, Garlic Butter Chicken, Easy Chicken Dinner, Crispy Chicken Skin


