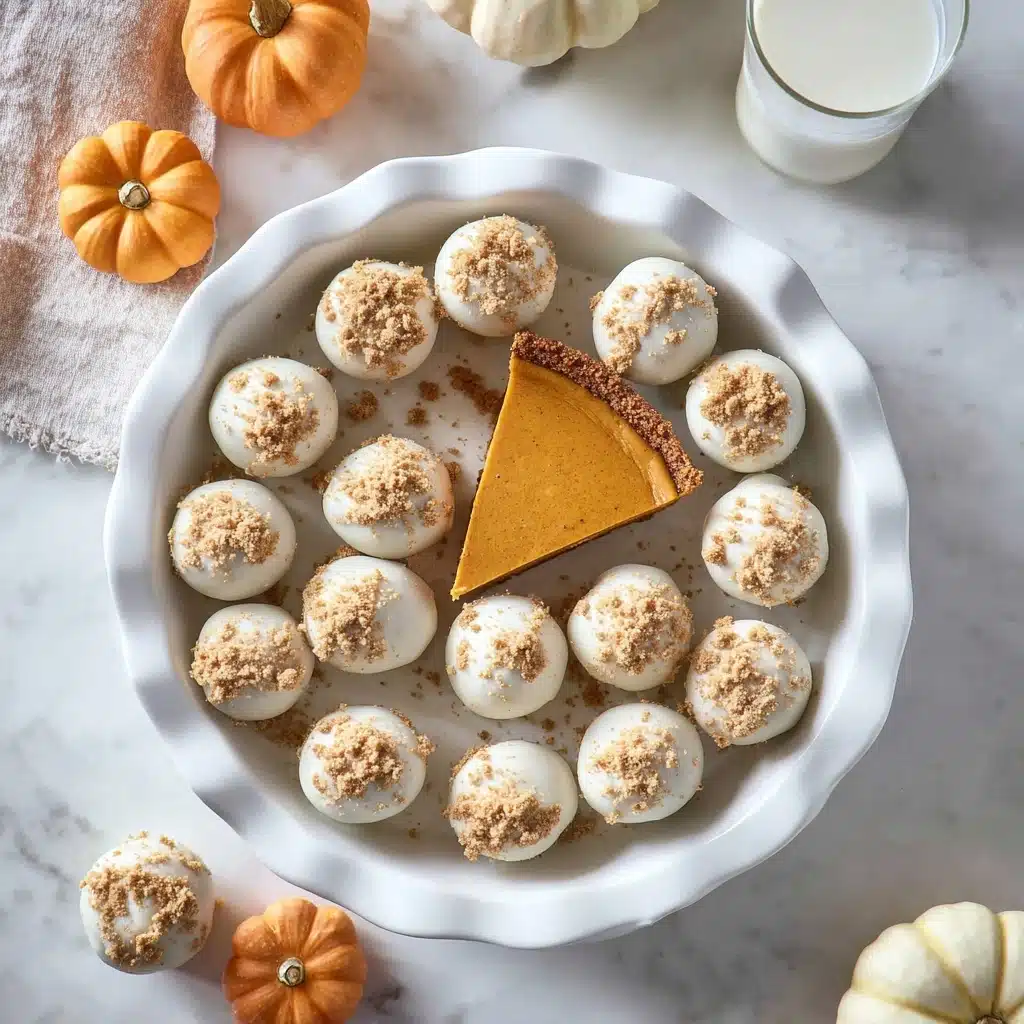
No-Bake Pumpkin Pie Balls Recipe
If you’re looking for a playful twist on classic fall flavors, these No-Bake Pumpkin Pie Balls are about to become your new obsession. Imagine everything you love about pumpkin pie transformed into delightful, bite-sized treats that come together quickly with minimal effort but deliver maximum comfort and spice-packed joy. Whether you want a festive dessert for a busy holiday party or a sweet snack to enjoy with your afternoon coffee, No-Bake Pumpkin Pie Balls bring creamy pumpkin filling, crunchy crust, and that perfect vanilla coating into one irresistible package you’ll want to share with everyone you know.

Ingredients You’ll Need
These ingredients are refreshingly simple yet essential because each one adds a crucial layer of flavor and texture. Together, they make the magic happen — from the creamy pumpkin filling to the crispy crunchy crust and that oh-so-smooth coating that seals all that goodness inside.
- 1 (9-inch) baked and chilled pumpkin pie: The star of the show, providing rich, spiced pumpkin filling and flaky crust — store-bought works perfectly for a fast and easy start.
- 1 (16 ounce) package vanilla candy coating or almond bark: This sweet, meltable shell turns your pumpkin pie balls into shiny, bite-sized delights and adds a lovely vanilla flavor that complements the spices in the pie.
How to Make No-Bake Pumpkin Pie Balls
Step 1: Reserve the Pie Crust
Before you jump into mixing, carefully set aside a small handful of the pie crust from your pumpkin pie. These crumbles are going to be your crunchy garnish, adding texture and that nostalgic pie crust flavor on the outside of your No-Bake Pumpkin Pie Balls.
Step 2: Mix the Pie Filling and Crust
Break the chilled pumpkin pie, crust and all, into chunks and toss it into the bowl of an electric mixer. Beat on low speed until everything combines into one moist, cohesive ball of pumpkin pie goodness. Don’t have a mixer? No worries — your hands work just as well to gently knead the mixture together in a large bowl!
Step 3: Shape the Balls and Chill
Roll the pumpkin pie mixture into roughly 2-tablespoon sized balls. Place them neatly on a parchment-lined baking sheet. Pop the tray into the freezer for about 30 minutes or the refrigerator for 2 hours to help the balls firm up so they’re easier to coat.
Step 4: Dip into the Melty Vanilla Coating
Melt your vanilla candy coating according to the package instructions. Using a fork, dip each chilled ball into the coating, twirling it gently to ensure every inch is covered. Lift it out and let any excess drip back into the bowl — then immediately sprinkle the reserved pie crust crumbles over each one, giving your No-Bake Pumpkin Pie Balls a perfectly textured finish.
Step 5: Set and Enjoy
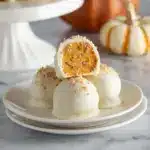
Let the coated pumpkin pie balls rest on the parchment paper until the candy coating has completely set. Soon you’ll have charming little bites bursting with all the warm spices and creamy textures of pumpkin pie, encased in a delicate vanilla shell with a hint of crisp crust on top.
How to Serve No-Bake Pumpkin Pie Balls
Garnishes
Sprinkling the reserved pie crust crumbles on top adds the ideal dose of crunch, but feel free to get creative. A light dusting of cinnamon sugar, a drizzle of caramel sauce, or even a tiny dollop of whipped cream can elevate these treats and make them dazzling on the dessert table.
Side Dishes
No-Bake Pumpkin Pie Balls shine brilliantly on their own but pair beautifully with warm drinks like chai tea, hot apple cider, or a rich latte. You might also serve them alongside a scoop of vanilla ice cream or a small bowl of spiced nuts for a fall-inspired platter that feels cozy and complete.
Creative Ways to Present
Turn your No-Bake Pumpkin Pie Balls into an eye-catching centerpiece by arranging them on a rustic wooden board or colorful fall-themed platters. Thread them onto skewers with fresh cranberries and mint leaves for a festive holiday snack. They also make delightful gifts wrapped up in clear cellophane tied with a festive ribbon!
Make Ahead and Storage
Storing Leftovers
These pumpkin pie balls keep best when stored in an airtight container in the refrigerator for up to 5 days. The candy coating maintains its crisp texture, and the sweet pumpkin filling stays moist and flavorful, making it easy to indulge any time.
Freezing
Want to enjoy these treats later? Freeze your No-Bake Pumpkin Pie Balls in a single layer on a baking sheet first, then transfer them to a freezer-safe bag or container. They’ll keep wonderfully for up to 2 months. When chilled properly, they maintain their delicious texture and flavor perfectly.
Reheating
No reheating is necessary or recommended since these are cold treats that are best enjoyed chilled. Simply thaw frozen pumpkin pie balls in the refrigerator for a few hours before serving for the best experience.
FAQs
Can I make No-Bake Pumpkin Pie Balls without using a mixer?
Absolutely! While a mixer makes the process quicker, you can easily combine the pumpkin pie filling and crust with your hands in a large bowl, gently pressing everything together until it forms a sticky ball.
What kind of pumpkin pie is best to use?
Any baked pumpkin pie works wonders here, whether homemade or store-bought. Just make sure it’s fully chilled to prevent the mixture from becoming too soft when mixing and shaping the balls.
Can I use chocolate coating instead of vanilla candy coating?
Yes! Using chocolate candy coating or almond bark adds a rich, complementary flavor and gives your No-Bake Pumpkin Pie Balls a decadent chocolate shell that’s perfect for chocolate lovers.
Are No-Bake Pumpkin Pie Balls suitable for freezing? How should I freeze them?
They freeze beautifully! Arrange the balls in a single layer on a baking sheet to harden, then transfer them to an airtight container or freezer bag to prevent freezer burn. Thaw in the refrigerator before enjoying.
Can these be made smaller or larger than 2 tablespoons?
Definitely. Adjust the size to your liking — smaller balls make sweet bite-sized party favors, while larger ones make more filling dessert portions. Just keep in mind that chilling times may vary slightly based on the size.
Final Thoughts
Once you try these No-Bake Pumpkin Pie Balls, you’ll wonder how you ever enjoyed pumpkin pie any other way. They’re simple, scrumptious, and packed with cozy autumn flavors that make every bite feel like a warm hug. So go ahead, dive in and enjoy the fun of pumpkin pie reinvented in the most delightful little balls of joy!
No-Bake Pumpkin Pie Balls Recipe
These No-Bake Pumpkin Pie Balls are a delightful, bite-sized twist on traditional pumpkin pie, perfect for holiday parties or anytime you crave a sweet, creamy treat without turning on the oven. Made from crumbled baked pumpkin pie mixed into balls and coated in smooth vanilla candy coating, these festive desserts are easy to prepare and irresistibly delicious.
- Prep Time: 10 minutes
- Cook Time: 0 minutes (no bake step)
- Total Time: 40 minutes (including chilling times)
- Yield: Approximately 20 pie balls 1x
- Category: Dessert, Snack
- Method: No-Bake, Mixing, Dipping
- Cuisine: American
- Diet: Vegetarian
Ingredients
Pie Balls
- 1 (9-inch) baked and chilled pumpkin pie (store-bought or homemade)
Coating
- 1 (16 ounce) package of vanilla candy coating or almond bark
Instructions
- Prepare Pie Crust Crumbles: Reserve some of the pie crust by breaking off small pieces from the baked pumpkin pie before mixing, to use as a crunchy topping for the coated balls.
- Mix Pie Filling and Crust: Break up the entire chilled pumpkin pie, including filling and crust, into a bowl. Beat with an electric mixer on low speed until the mixture forms a moist, cohesive ball. Alternatively, mix by hand in a large bowl until well combined.
- Shape the Balls: Roll the pie mixture into approximately 2-tablespoon-sized balls and arrange them on a parchment-lined baking sheet. Chill the balls by placing the sheet in the freezer for 30 minutes or the refrigerator for 2 hours to firm up.
- Melt Candy Coating: Melt the vanilla candy coating according to package directions in a shallow bowl, ensuring it is smooth and ready for dipping.
- Coat the Pie Balls: One at a time, dip each pie ball into the melted candy coating. Use a fork to turn the ball around until fully coated, then lift it out and let excess coating drip off. Place the coated ball back onto the parchment-lined sheet and immediately sprinkle with the reserved pie crust crumbles. Repeat this process for all the pie balls.
- Set the Coating: Allow the coated pie balls to rest at room temperature until the candy coating has completely hardened and set, making them ready to serve.
Notes
- Use a store-bought 9-inch pumpkin pie for convenience or make your favorite homemade pumpkin pie and chill thoroughly before use.
- If you prefer, substitute vanilla candy coating with white chocolate bark or colored candy melts for a festive touch.
- To avoid mess, work with cold pie balls straight from the fridge or freezer when dipping.
- Store pie balls in an airtight container in the refrigerator; they keep well for up to 3 days.
- Pie crust crumbles can be omitted if you want a smoother finish, or substitute with crushed gingersnap cookies for extra flavor.
Nutrition
- Serving Size: 1 pie ball (approx. 30g)
- Calories: 120
- Sugar: 10g
- Sodium: 90mg
- Fat: 7g
- Saturated Fat: 4g
- Unsaturated Fat: 2g
- Trans Fat: 0g
- Carbohydrates: 14g
- Fiber: 1g
- Protein: 1g
- Cholesterol: 15mg
Keywords: Pumpkin pie balls, no bake pumpkin dessert, holiday treats, pumpkin snack bites, candy coated pumpkin balls

