The Ultimate Graham Cracker Crust – 3 Ingredients Recipe
Introduction
The ultimate graham cracker crust is a simple, versatile base perfect for pies and cheesecakes. With just three ingredients, you can create a crisp and flavorful crust that pairs beautifully with both baked and no-bake desserts.
Ingredients
- 1 1/2 cups graham cracker crumbs (about 12 full sheet graham crackers, crushed)
- 1/4 cup granulated sugar (or brown sugar, or a combination of both)
- 6 tablespoons unsalted or salted butter, melted (coconut oil melted can be used; add a dash of salt if using unsalted butter)
Instructions
- Step 1: If you don’t have graham cracker crumbs, crush whole graham crackers until finely ground. You can do this in a food processor or place the crackers in a large zip-top bag and crush with a rolling pin.
- Step 2: In a bowl, mix the graham cracker crumbs and sugar together. Pour in the melted butter or coconut oil and stir with a fork until all the crumbs are evenly coated and damp.
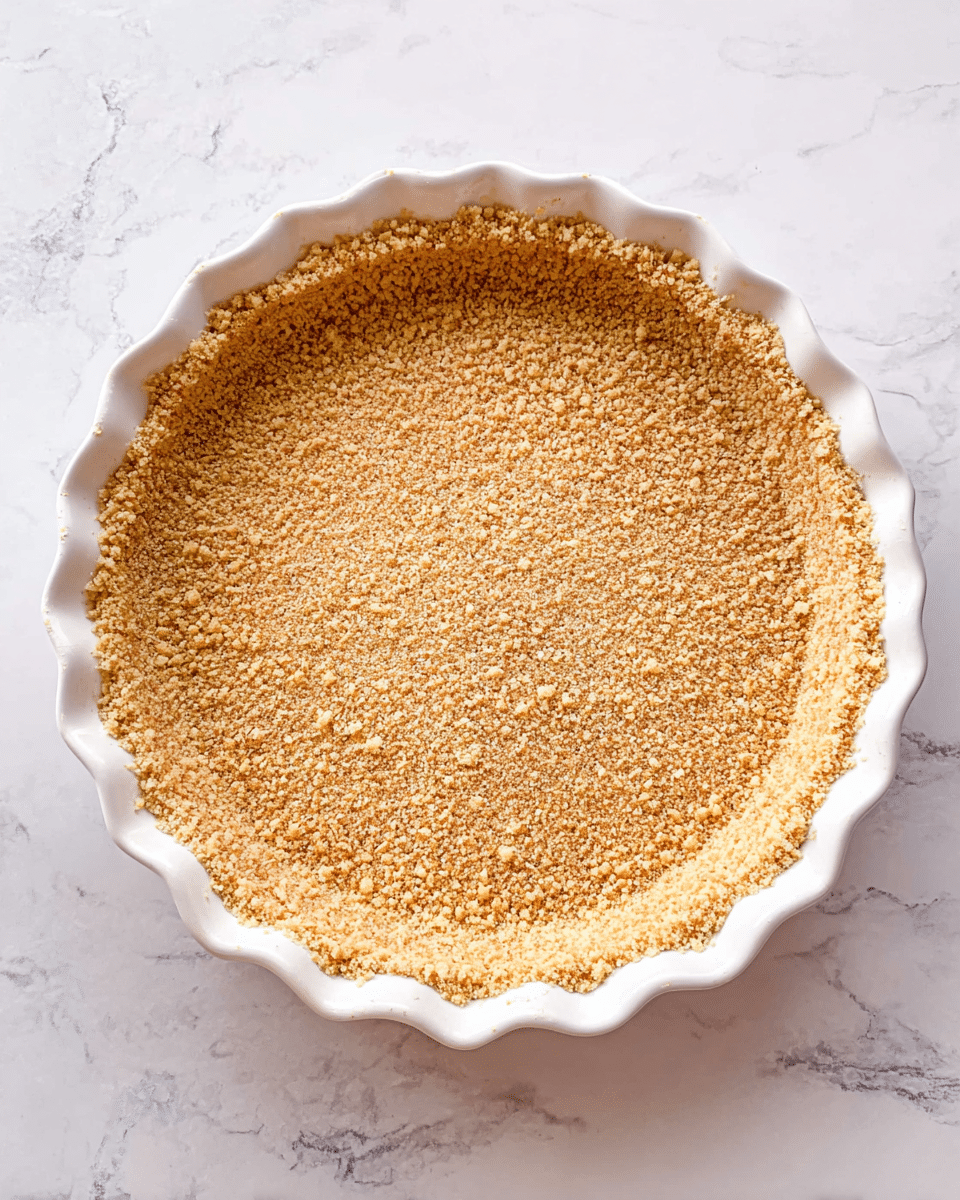
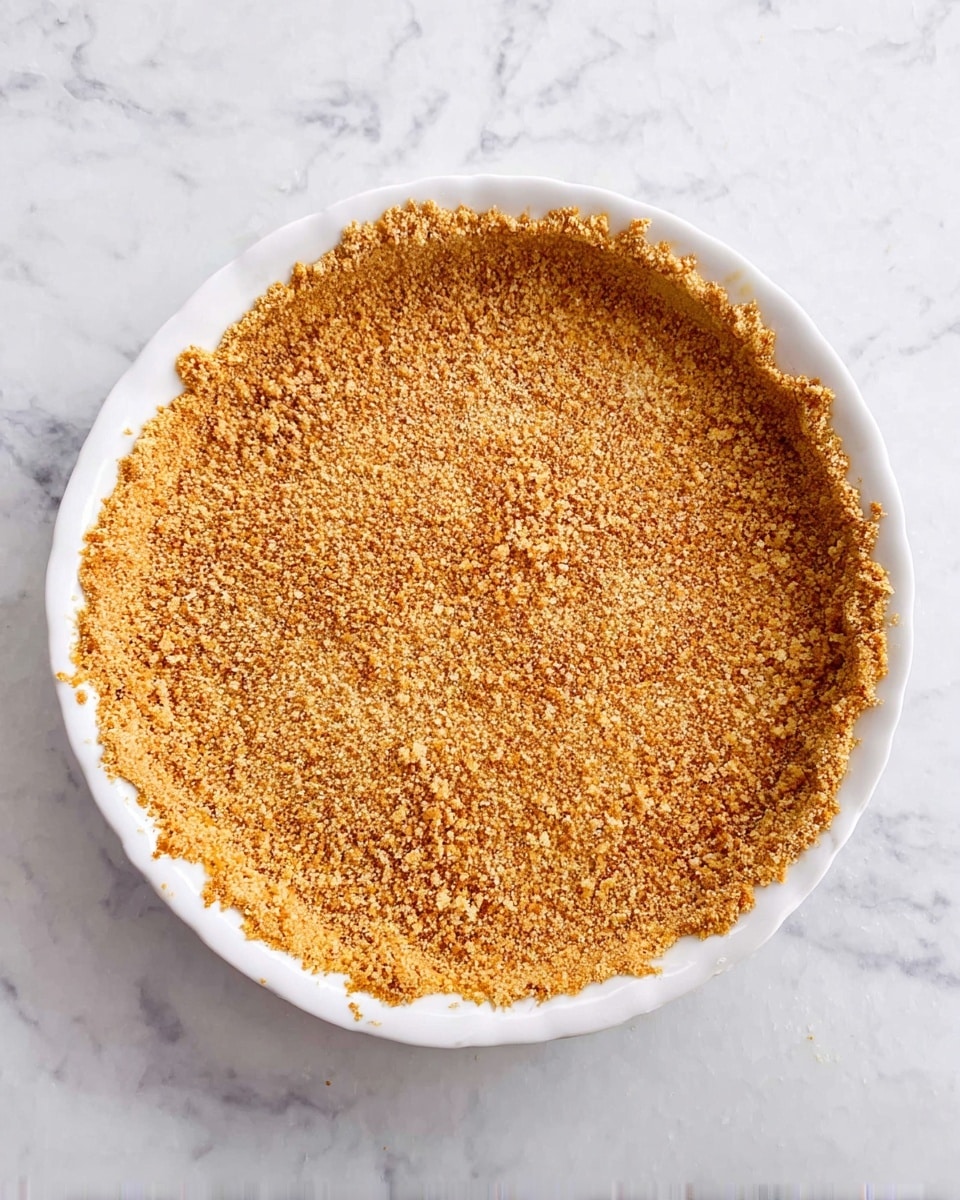
- Step 3: Transfer the crumb mixture into a pie plate or springform pan. Use the bottom of a clean measuring cup or your fingers to press the crumbs firmly into the bottom and up the sides, forming an even crust layer.
- Step 4: For a firmer and crispier crust, bake it at 375°F (190°C) for 8 to 10 minutes. Alternatively, for no-bake desserts, chill the crust in the refrigerator for 10 to 20 minutes to set.
Tips & Variations
- For extra flavor, add a pinch of cinnamon or a teaspoon of vanilla extract to the crumb mixture before pressing it into the pan.
- Try substituting half the graham crackers with digestive biscuits or vanilla wafers for a unique twist.
- Use brown sugar instead of granulated sugar for a richer, caramel-like taste.
- To make a dairy-free version, use melted coconut oil instead of butter and add a pinch of salt for balance.
Storage
Store any leftover crust in an airtight container at room temperature for up to 3 days, or in the refrigerator for up to a week. If the crust is baked, it can be frozen for up to 3 months; thaw before using. Reheat a baked crust briefly in the oven to restore crispness.
How to Serve
Serve this delicious recipe with your favorite sides.
FAQs
Can I use this crust for cheesecake?
Yes, this graham cracker crust works wonderfully for cheesecake, especially when baked to create a sturdy base that holds up well to creamy fillings.
What if I don’t have graham crackers?
If graham crackers aren’t available, try using digestive biscuits, vanilla wafers, or even crushed cookies that complement your dessert’s flavor.
PrintThe Ultimate Graham Cracker Crust – 3 Ingredients Recipe

This Ultimate Graham Cracker Crust recipe uses just three simple ingredients to create a perfect base for your pies and cheesecakes. Made from graham cracker crumbs, sugar, and melted butter or coconut oil, it can be baked for a crisp texture or chilled for a no-bake option. Easy to prepare and versatile, this crust is a game-changer for dessert lovers.
- Prep Time: 10 minutes
- Cook Time: 8-10 minutes (optional baking)
- Total Time: 18-20 minutes
- Yield: Enough crust for one 9-inch pie or springform pan
- Category: Dessert
- Method: Baking
- Cuisine: American
- Diet: Vegetarian
Ingredients
Crust Ingredients
- 1 1/2 cups graham cracker crumbs (equivalent to 12 full sheet graham crackers, crushed into crumbs)
- 1/4 cup granulated sugar (or brown sugar, or a combination of both)
- 6 tablespoons unsalted butter or salted butter (melted) or coconut oil (melted) – add a dash of salt if using unsalted butter, if desired
Instructions
- Prepare Graham Cracker Crumbs: If you don’t have graham cracker crumbs on hand, pulverize graham crackers yourself. Use a food processor to grind them finely or place the crackers in a large ziplock bag and crush them using a rolling pin until you achieve a fine crumb texture.
- Mix Ingredients: In a mixing bowl, combine the graham cracker crumbs and sugar. Pour in the melted butter or coconut oil and mix thoroughly with a fork until all crumbs are evenly coated and wet.
- Form the Crust: Transfer the crumb mixture into a pie plate or springform pan. Use the bottom of a clean measuring cup or your fingers to firmly press the mixture into an even layer on the bottom and up the sides of the pan, shaping the crust evenly.
- Bake or Chill: For a crispier crust, bake it at 375°F (190°C) for 8-10 minutes, then allow it to cool before filling. Alternatively, if your recipe is no-bake, chill the crust in the refrigerator for 10-20 minutes to help it firm up before adding the filling.
Notes
- You can substitute brown sugar or use a combination of granulated and brown sugar for a richer flavor.
- Using salted butter can add flavor, but adjust the salt accordingly if using unsalted butter or coconut oil.
- This crust works perfectly for cheesecakes, pies, and other no-bake or baked desserts.
- Pressing the crumbs firmly into the pan helps the crust hold together better during filling and serving.
- Store any leftover crust mixture before baking in an airtight container in the refrigerator for up to 2 days.
Keywords: graham cracker crust, pie crust, cheesecake crust, easy dessert base, no-bake crust, simple crust recipe