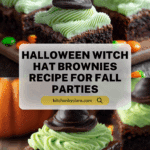
Wicked Witch Hat Brownies Recipe
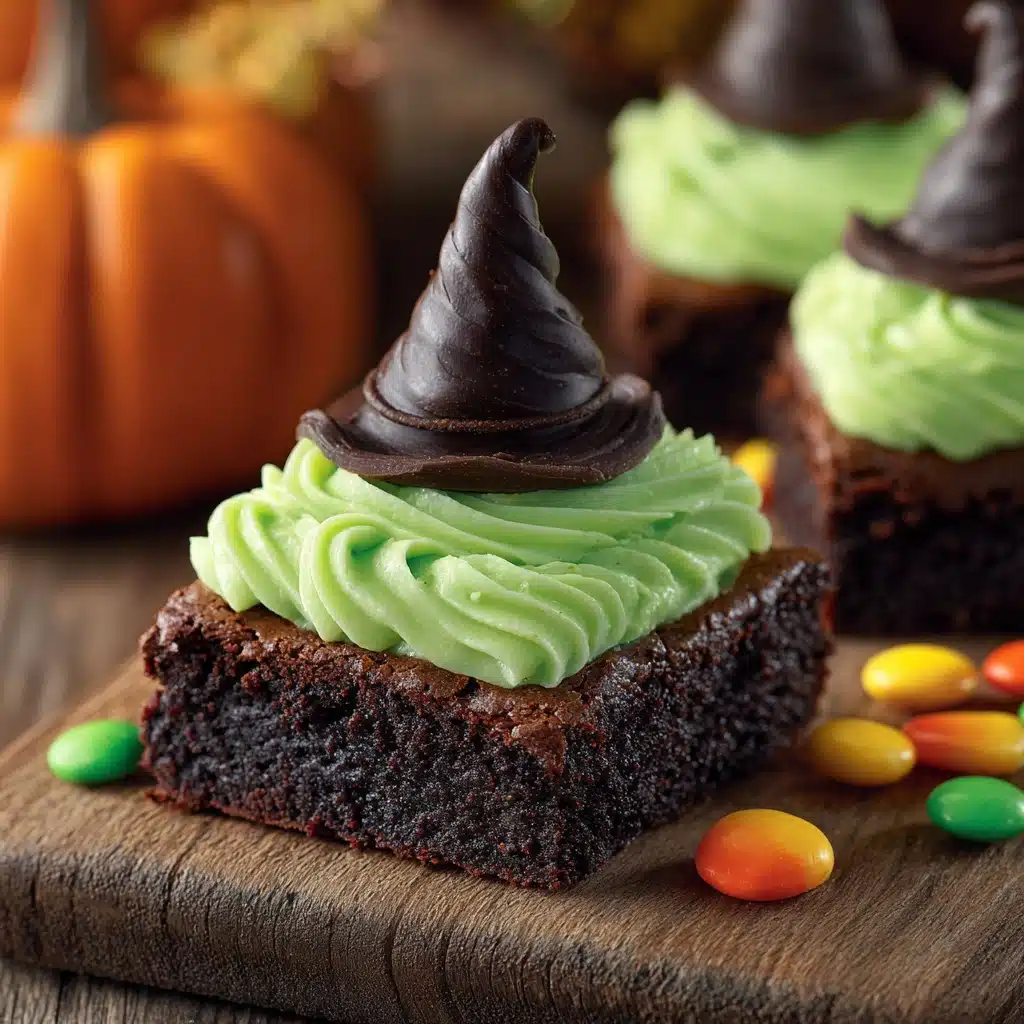
If you’re hunting for a Halloween treat that’s as fun to make as it is to eat, these Wicked Witch Hat Brownies are exactly what you need. Imagine rich, fudgy brownies topped with bright green frosting and crowned with chocolate ice cream cones shaped like spooky witch hats—this deliciously festive creation brings a magical twist to your dessert table that will captivate kids and adults alike. Each bite offers classic brownie goodness combined with a playful presentation that makes Halloween celebration truly unforgettable.

Ingredients You’ll Need
These ingredients are simple pantry staples that work beautifully together to create the perfect base and impressive decoration for Wicked Witch Hat Brownies. Each component plays a special role, whether it’s providing the fudgy texture, that deep chocolate flavor, or the vibrant, fun topping that makes these treats stand apart.
- 1 cup (225g) unsalted butter: Melts smoothly to create a rich, tender brownie foundation.
- 2 cups (400g) granulated sugar: Sweetens while helping with the chewy texture.
- 4 large eggs: Bind everything together and add moisture for that perfect softness.
- 1 teaspoon vanilla extract: Adds a fragrant warmth that enhances the chocolate flavor.
- 1 cup (125g) all-purpose flour: The structure behind every blissful bite.
- 1 cup (90g) unsweetened cocoa powder: Provides that deep, rich chocolate essence that’s unmistakable in brownies.
- 1/2 teaspoon salt: Balances sweetness and intensifies the chocolate notes.
- 1/2 teaspoon baking powder: Gives just enough lift to keep the brownies soft but not cakey.
- 12 chocolate ice cream cones: The magic hats that top each brownie with an adorable Halloween vibe.
- 2 cups (300g) powdered sugar: Essential for smooth, sweet frosting to mimic a witch’s cloak.
- 1/4 cup (60ml) milk: Thins the frosting to just the right consistency for spreading.
- 1 teaspoon vanilla extract (for frosting): Adds flavor dimension in the frosting layer.
- Green food coloring: Makes the frosting pop with enchanting color, perfect for witch hats.
- Halloween-themed sprinkles: Adds festive fun and texture to the final presentation.
How to Make Wicked Witch Hat Brownies
Step 1: Create the Brownie Batter
Start off by melting the unsalted butter until it’s silky and smooth—this will give your brownies that luscious richness. Stir in the granulated sugar while the butter is still warm to dissolve it slightly, then add the eggs one by one, mixing well after each addition. Don’t forget the vanilla extract here—it’s a small step that adds so much flavor depth to your brownies!
Step 2: Combine Dry Ingredients
In a separate bowl, whisk together the all-purpose flour, unsweetened cocoa powder, salt, and baking powder. This ensures even distribution so every bite is perfectly chocolaty and balanced. Gently fold this dry mix into your butter-sugar-egg batter—be careful not to overmix; you want tender brownies, not dense ones.
Step 3: Bake the Brownies
Pour your smooth batter into a 9×13 inch baking pan, greased or lined with parchment paper, to ensure easy removal. Bake in a preheated oven at 350°F (175°C) for 25-30 minutes. You’re looking for a moist, fudgy center with just a slight pull away at the edges—classic brownie perfection!
Step 4: Let Brownies Cool
Patience is key here! Allow the brownies to cool completely right in the pan on a wire rack. This cooling phase helps the brownies set up firmly so they’ll be easier to frost and decorate without crumbling.
Step 5: Prep the Witch Hats
While the brownies cool, get your chocolate ice cream cones ready—they become the iconic witch hats! If you want an extra flourish, dip the tops in melted chocolate and immediately sprinkle them with Halloween-themed sprinkles. This step is optional but adds wonderful texture and visual appeal.
Step 6: Make the Green Frosting
Mix together powdered sugar, milk, vanilla extract, and a few drops of green food coloring until smooth and spreadable. This frosting will mimic the witch’s cloak and is where your fun color comes to life!
Step 7: Assemble Your Wicked Witch Hat Brownies
Carefully spread the green frosting over the cooled brownies in an even layer. Then, place an upside-down chocolate ice cream cone onto each square to create the classic witch hat shape. Sprinkle some Halloween-themed sprinkles on the frosting or hats for that final festive touch.
How to Serve Wicked Witch Hat Brownies
Garnishes
Adding a few extra Halloween sprinkles or edible glitter around the plate gives your Wicked Witch Hat Brownies an enchanting look. You can even dust a little cocoa powder or powdered sugar “fog” around the platter to add to the spooky vibe.
Side Dishes
These brownies pair marvelously with a scoop of vanilla or pumpkin ice cream, or even some cinnamon-spiced whipped cream. A warm cup of spiced cider or hot chocolate also makes this treat feel like a cozy autumnal delight.
Creative Ways to Present
For an unforgettable party, arrange your Wicked Witch Hat Brownies on a tiered cake stand surrounded by autumn leaves and small pumpkins. Wrapping each brownie in clear cellophane tied with a ribbon makes for charming take-home favors. You could also serve on a dark slate platter to accentuate the bright green frosting and chocolate cones.
Make Ahead and Storage
Storing Leftovers
Keep your Wicked Witch Hat Brownies fresh by storing them in an airtight container at room temperature for up to three days. If your kitchen tends to be warm, refrigerate them to maintain the frosting’s texture, but allow them to come to room temperature before serving for best flavor.
Freezing
If you want to keep these brownies longer, freeze them unassembled (just the plain brownies) wrapped tightly in plastic wrap and aluminum foil for up to three months. Thaw completely before frosting and decorating with your witch hats to avoid sogginess.
Reheating
For that freshly-baked warmth, microwave individual brownies for 10-15 seconds. Avoid reheating the frosting or the cone hats to prevent melting or damage to your festive design. Alternatively, enjoy them at room temperature to savor the full flavor and texture.
FAQs
Can I use gluten-free flour in this recipe?
Absolutely! Just swap the all-purpose flour for a gluten-free blend designed for baking, and your Wicked Witch Hat Brownies will be just as delicious and fudgy.
What’s the best way to prevent the frosting from running?
Make sure the brownies are completely cooled before frosting, and use powdered sugar frosting with the right milk ratio—not too thin. Chilling the frosting briefly can also help it hold up better.
Can I make these dairy-free?
Yes, substitute the butter with a quality plant-based margarine and use a dairy-free milk alternative for the frosting. The cupcakes will still taste wonderful!
How do I keep the ice cream cones from getting soggy on the brownies?
Assemble the brownies and hats shortly before serving to keep the cones crisp. If preparing ahead, store components separately and combine at the last minute for the best texture.
Is it okay to use regular food coloring instead of gel?
Regular food coloring works just fine, but you might need slightly more to achieve a vibrant green. Keep an eye on frosting consistency, as extra liquid could thin it out.
Final Thoughts
These Wicked Witch Hat Brownies are not only a delightful treat but also a fantastic way to bring a little extra magic to your Halloween festivities. Whether you’re making them with kids, serving them at a party, or simply indulging a chocolate craving, this recipe is sure to conjure smiles and compliments. Give it a try and watch these spooky, scrumptious creations steal the show!
Wicked Witch Hat Brownies Recipe

Delightfully spooky and delicious, these Wicked Witch Hat Brownies combine rich, fudgy brownies topped with vibrant green frosting and chocolate ice cream cone witch hats decorated with Halloween sprinkles. Perfect for Halloween parties or festive treat tables, this recipe offers a fun and visually impressive dessert that’s easy to assemble and irresistible to eat.
- Prep Time: 20 minutes
- Cook Time: 30 minutes
- Total Time: 50 minutes
- Yield: 12 brownies (12 witch hat-topped squares) 1x
- Category: Dessert
- Method: Baking
- Cuisine: American
- Diet: Vegetarian
Ingredients
Brownie Ingredients
- 1 cup (225g) unsalted butter
- 2 cups (400g) granulated sugar
- 4 large eggs
- 1 teaspoon vanilla extract
- 1 cup (125g) all-purpose flour
- 1 cup (90g) unsweetened cocoa powder
- 1/2 teaspoon salt
- 1/2 teaspoon baking powder
Witch Hat and Frosting Ingredients
- 12 chocolate ice cream cones
- 2 cups (300g) powdered sugar
- 1/4 cup (60ml) milk
- 1 teaspoon vanilla extract (for frosting)
- Green food coloring (as needed)
- Halloween-themed sprinkles (for decoration)
Optional Decoration
- Extra melted chocolate (for dipping cones in)
Instructions
- Prepare the brownie batter: Melt the unsalted butter completely and mix it with the granulated sugar until well combined. Add the eggs one at a time, beating well after each addition, then stir in the vanilla extract.
- Combine dry ingredients: In a separate bowl, whisk together the all-purpose flour, unsweetened cocoa powder, salt, and baking powder. Gradually add this dry mixture to the wet ingredients, stirring just until combined to avoid overmixing.
- Bake the brownies: Pour the batter into a greased or lined 9×13 inch baking pan, spreading evenly. Bake in a preheated oven at 350°F (175°C) for 25-30 minutes, or until a toothpick inserted near the center comes out with moist crumbs but no wet batter.
- Cool the brownies: Allow the brownies to cool completely in the pan on a wire rack to ensure the frosting adheres well.
- Prepare the witch hats: Optionally dip the tops of the chocolate ice cream cones into melted chocolate, then immediately sprinkle with Halloween-themed sprinkles. Let them set until firm.
- Make the frosting: In a mixing bowl, combine powdered sugar, milk, vanilla extract, and a few drops of green food coloring. Whisk until smooth and thick enough to spread easily.
- Frost the brownies: Spread the green frosting evenly over the cooled brownies using a spatula.
- Assemble the witch hats: Place an upside-down chocolate ice cream cone on top of each frosted brownie square. Decorate further with Halloween-themed sprinkles as desired.
Notes
- Ensure the brownies are completely cool before frosting and topping to prevent melting.
- You can substitute green food coloring with natural alternatives like spinach powder if preferred.
- Use high-quality cocoa powder for a richer chocolate flavor.
- Store brownies in an airtight container at room temperature for up to 3 days or refrigerated for up to a week.
- For younger children, consider omitting the melted chocolate dip on cones to reduce mess.
Nutrition
- Serving Size: 1 brownie with witch hat
- Calories: 370 kcal
- Sugar: 45 g
- Sodium: 160 mg
- Fat: 18 g
- Saturated Fat: 11 g
- Unsaturated Fat: 6 g
- Trans Fat: 0.2 g
- Carbohydrates: 54 g
- Fiber: 4 g
- Protein: 5 g
- Cholesterol: 70 mg
Keywords: Halloween brownies, witch hat brownies, spooky dessert, chocolate brownies, Halloween treats

