Christmas Mints Recipe
Introduction
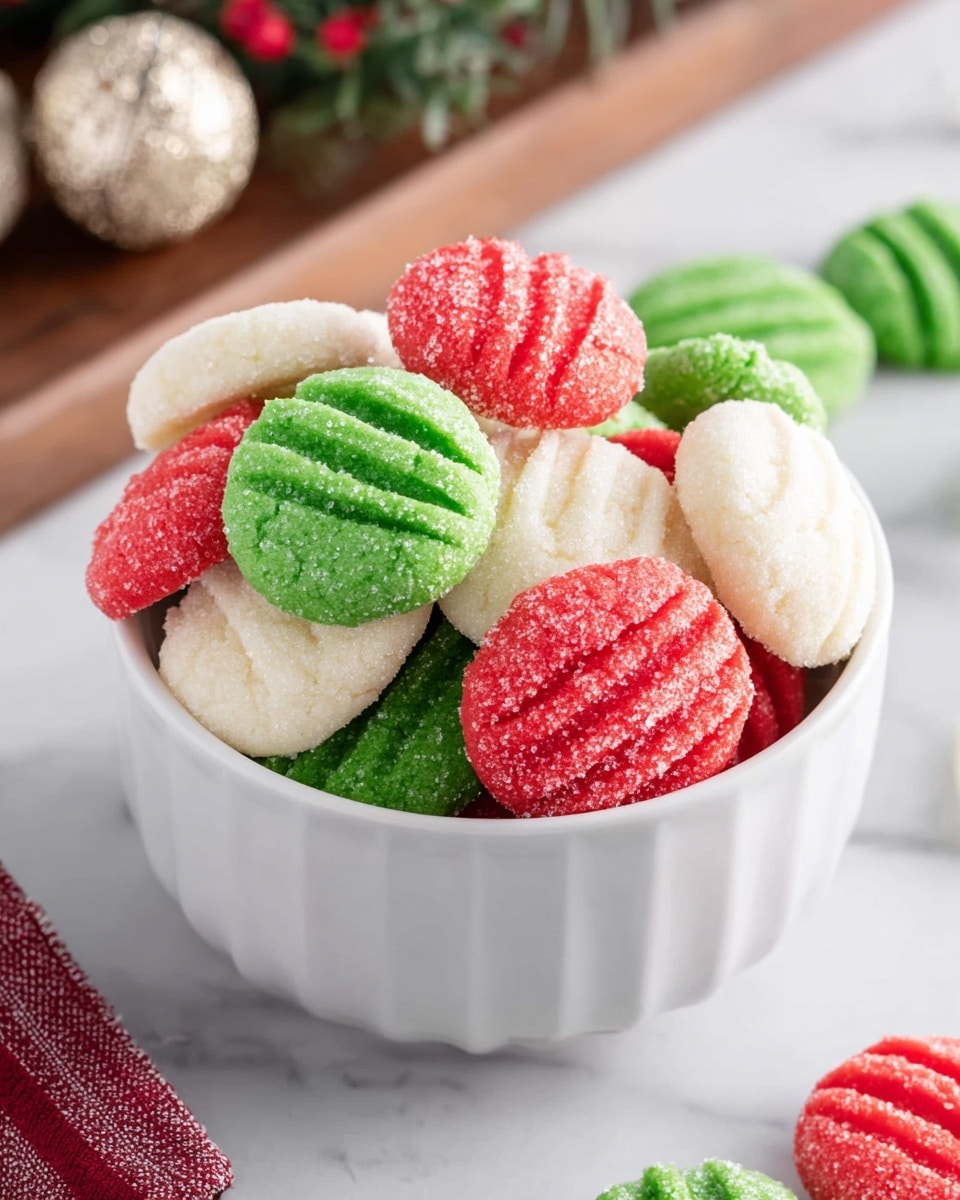
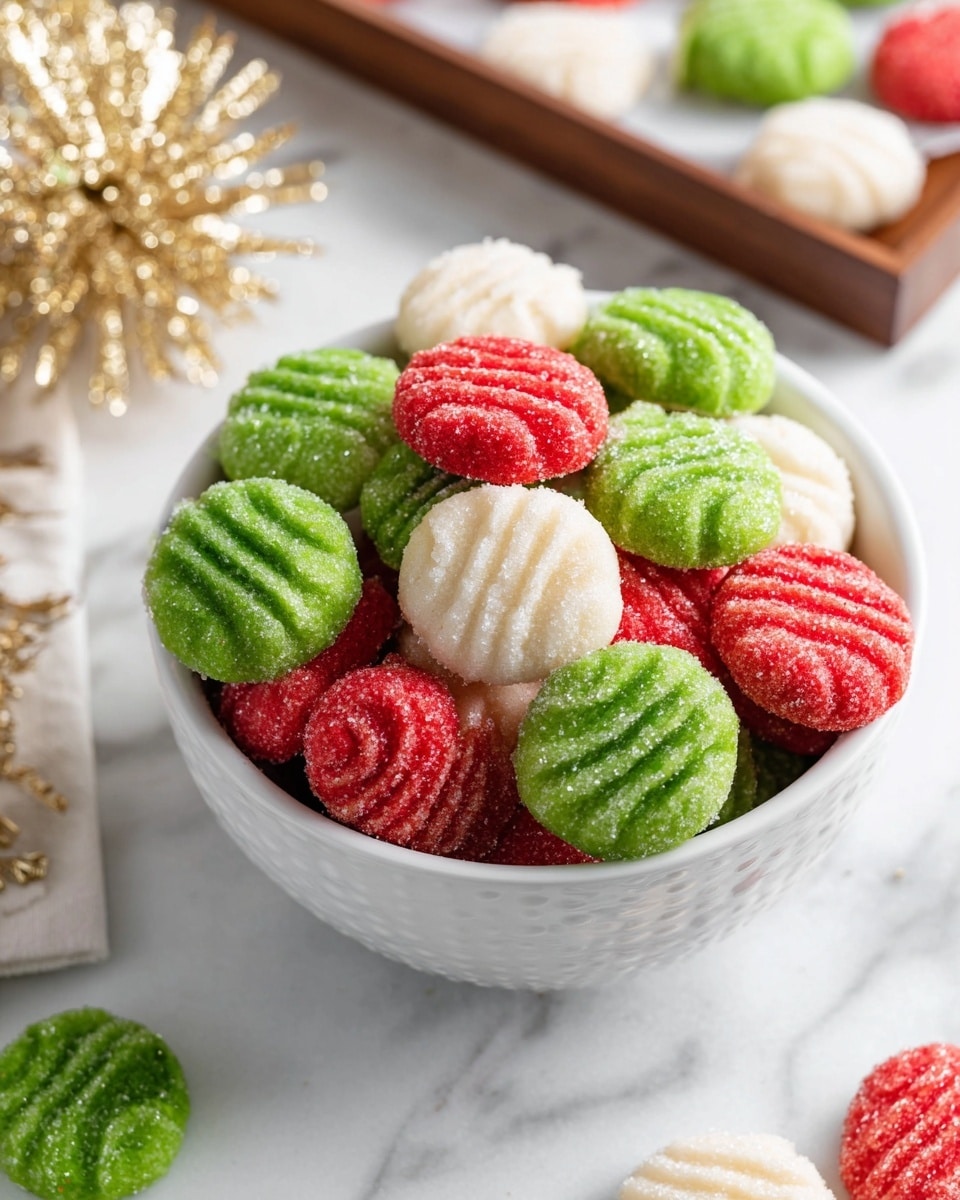
These Christmas Mints are a festive and refreshing treat perfect for the holiday season. With a creamy texture and vibrant red, green, and white colors, they make a delightful addition to any dessert platter or holiday gift.
Ingredients
- ⅓ cup granulated sugar
- 4 ounces cream cheese, room temperature
- 2 tablespoons unsalted butter, room temperature
- 2 tablespoons light/clear corn syrup (such as Karo brand)
- 1 teaspoon peppermint extract
- 4¼ to 5 cups powdered sugar, divided
- 6 drops green liquid food coloring
- 6 drops red liquid food coloring
Instructions
- Step 1: Line a large rimmed baking tray with parchment paper and place the granulated sugar in a small bowl. Set aside.
- Step 2: In a large mixing bowl, use a handheld mixer on low speed to beat the cream cheese, unsalted butter, corn syrup, and peppermint extract for about 1 minute until smooth.
- Step 3: Gradually add 4¼ cups of powdered sugar, half a cup at a time, mixing on low speed. As the mixture thickens, finish mixing by hand with a spatula or wooden spoon.
- Step 4: Place a piece of parchment paper on a clean counter and sprinkle ¼ cup of the remaining powdered sugar onto it. Turn the dough out onto the powdered sugar.
- Step 5: Divide the dough into three equal parts. Make a shallow well in the center of two portions. Add red food coloring to one, green food coloring to the second, and leave the third white.
- Step 6: Knead the colored dough balls until the color is even. Add up to ¼ cup more powdered sugar as needed to reduce stickiness. Knead the white dough lightly with a bit of powdered sugar if necessary.
- Step 7: Roll each dough ball into an 18-inch long rope about 1 inch thick.
- Step 8: Slice each rope into ½-inch pieces from one end to the other.
- Step 9: Roll each piece between your palms to form small balls and set aside.
- Step 10: Toss 2 to 3 dough balls at a time in the granulated sugar bowl to coat, then place them on the prepared baking tray. Repeat until all are coated.
- Step 11: Press each coated ball gently with the tip of a fork to flatten into discs, creating a striped pattern on top.
- Step 12: Let the mints sit at room temperature on the tray for up to 24 hours to dry and set before serving.
Tips & Variations
- If your dough is too sticky, add powdered sugar gradually to avoid dryness; remember, you can always add more but can’t take it away.
- For a stronger peppermint flavor, add a little more peppermint extract, but be careful not to overpower the balance.
- Use gel food coloring instead of liquid for less added moisture and more vibrant colors.
- Try rolling the mints in colored sugar instead of granulated sugar for extra sparkle.
Storage
Store the Christmas mints in an airtight container at room temperature. They will keep well for up to two weeks. Avoid refrigeration as it can affect texture. If needed, re-flatten before serving to refresh their appearance.
How to Serve
Serve this delicious recipe with your favorite sides.
FAQs
Can I make these mints ahead of time?
Yes, these mints can be made up to two weeks in advance. Store them in an airtight container at room temperature to keep them fresh.
What can I use if I don’t have corn syrup?
You can substitute light corn syrup with an equal amount of honey or maple syrup, but the texture and sweetness may vary slightly.
PrintChristmas Mints Recipe

These festive Christmas Mints are creamy, flavorful peppermint patties perfect for holiday celebrations. Made with cream cheese, butter, and peppermint extract, these colorful treats are easy to prepare with a no-bake method and decorated with classic red, green, and white colors to brighten up your dessert table.
- Prep Time: 15 minutes
- Cook Time: 0 minutes
- Total Time: 15 minutes plus up to 24 hours drying time
- Yield: About 60 peppermint patties 1x
- Category: Confectionery
- Method: No-Cook
- Cuisine: American
- Diet: Vegetarian
Ingredients
Base Ingredients
- ⅓ cup granulated sugar
- 4 ounces cream cheese, room temperature
- 2 tablespoons unsalted butter, room temperature
- 2 tablespoons light/clear corn syrup (Karo brand recommended)
- 1 teaspoon peppermint extract
Powdered Sugar & Coloring
- 4¼ to 5 cups powdered sugar, divided
- 6 drops green liquid food coloring
- 6 drops red liquid food coloring
Instructions
- Prepare Baking Tray: Line a large rimmed baking tray with parchment paper and set aside. Place granulated sugar into a small bowl for coating later.
- Mix Base Ingredients: In a large mixing bowl, beat cream cheese, unsalted butter, corn syrup, and peppermint extract on low speed for 1 minute until smooth and combined.
- Add Powdered Sugar: Gradually add 4¼ cups powdered sugar, about ½ cup at a time, mixing on low. As the dough thickens, finish mixing with a spatula or wooden spoon until fully combined and dough forms.
- Prepare Dough Surface: Spread parchment paper on a clean counter and sprinkle with ¼ cup powdered sugar. Turn dough out onto this surface.
- Divide and Color Dough: Divide dough into three equal parts. Make shallow wells in two portions; add red food coloring to one and green to the other. Leave the third portion white.
- Knead Colored Dough: Knead red and green dough balls to distribute color evenly, adding up to ¼ cup additional powdered sugar if dough becomes sticky. Lightly knead white dough with tablespoon or two extra powdered sugar as needed.
- Shape into Ropes: Roll each dough ball into an 18-inch long rope about 1 inch thick.
- Slice Dough: Cut ropes into ½-inch slices until all dough is divided.
- Form Mints: Roll each piece into small balls using palms. Set aside.
- Coat with Granulated Sugar: Toss 2 to 3 dough balls at a time in granulated sugar bowl to coat, then place on prepared baking tray. Repeat until all balls are coated.
- Shape Patties: Press each sugar-coated ball into a disc about ½-inch thick using the tines of a fork to create a striped pattern on top.
- Dry and Set: Allow the peppermint patties to rest on the tray at room temperature for up to 24 hours to dry and set before serving.
Notes
- Adding powdered sugar gradually helps achieve the right dough consistency without making it too dry.
- Kneading dough well ensures even color distribution for festive appearance.
- Adjust additional powdered sugar during kneading based on dough stickiness and room temperature.
- Letting the mints dry for up to 24 hours helps them firm up and develop a better texture.
- Store finished mints in an airtight container at room temperature for up to two weeks.
Keywords: Christmas mints, peppermint patties, holiday candy, no-bake mints, festive treats, peppermint extract candy

