Red Velvet Whoopie Pies Recipe
Introduction
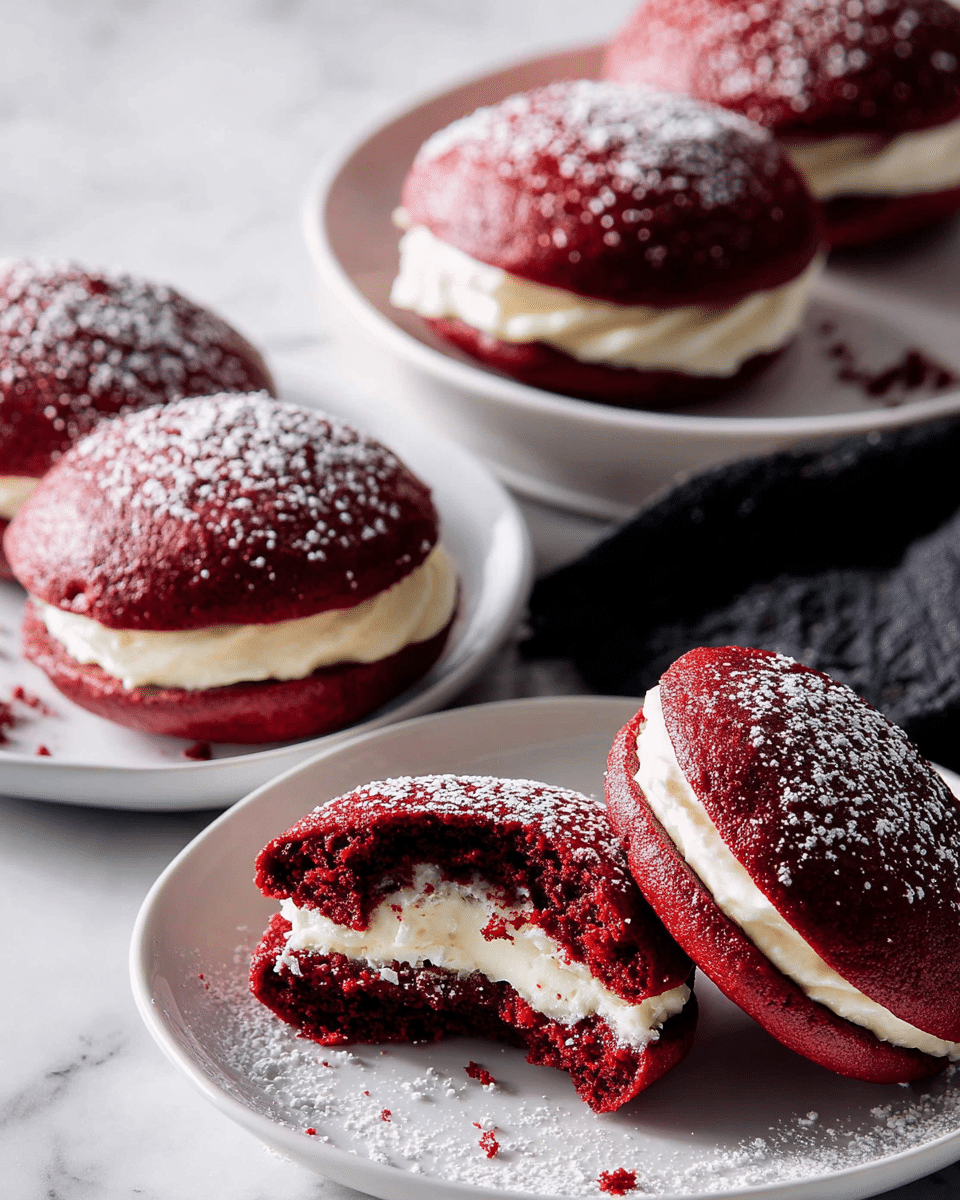
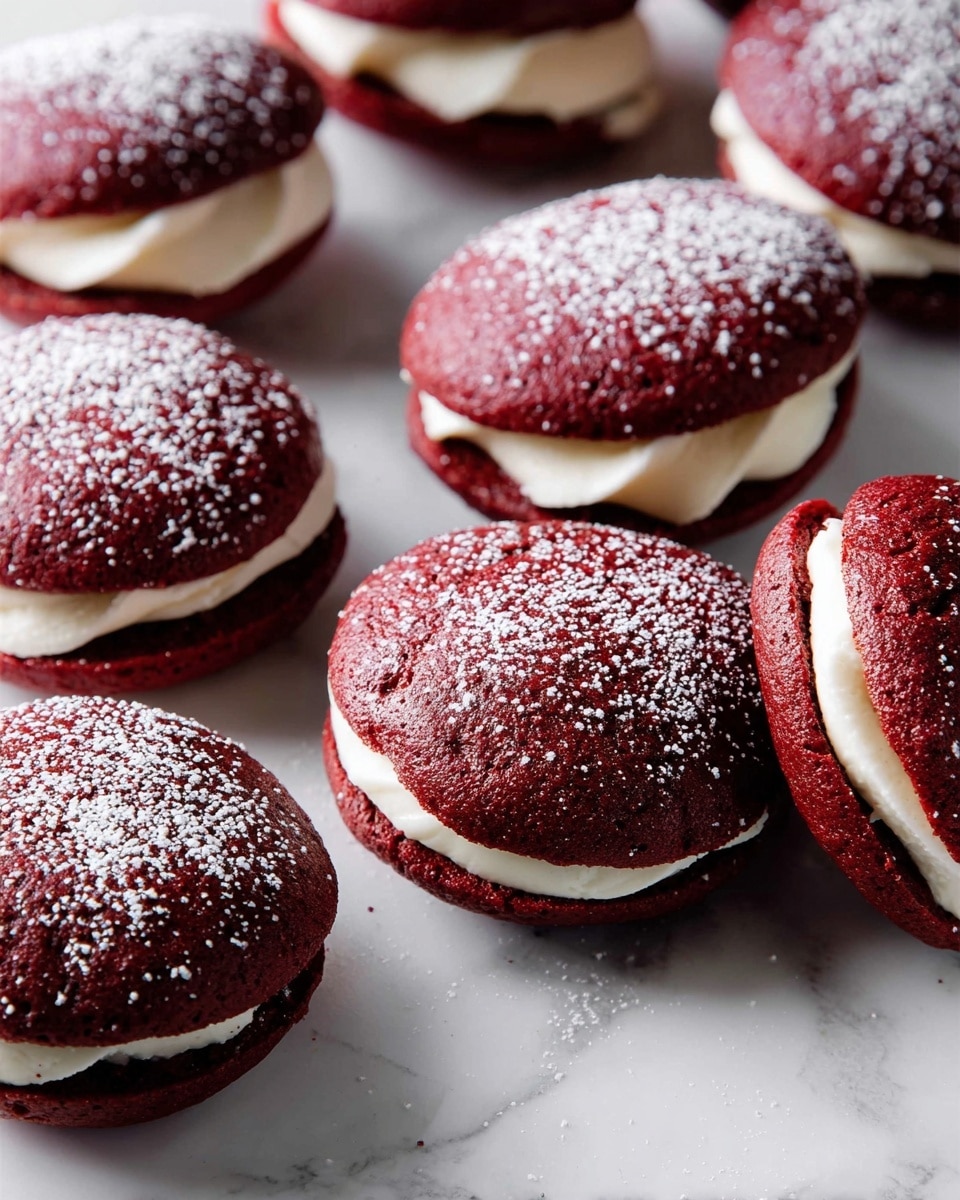
Red Velvet Whoopie Pies offer a delightful twist on classic cookies with their vibrant color and rich, velvety texture. These soft, cakey treats sandwiched with a creamy cream cheese filling are perfect for any occasion. Let’s dive into making these festive and delicious desserts!
Ingredients
- 2 cups (250g) all-purpose flour (spooned & leveled)
- 3 Tablespoons (15g) unsweetened natural cocoa powder
- 1 teaspoon baking soda
- 1/2 teaspoon salt
- 1/2 cup (8 Tbsp; 113g) unsalted butter, softened to room temperature
- 1 cup (200g) packed light brown sugar
- 1 large egg, room temperature
- 2/3 cup (160ml) buttermilk, room temperature
- 2 teaspoons pure vanilla extract
- Gel red food coloring
- Cream Cheese Filling:
- 6 ounces (170g) full-fat brick cream cheese, softened to room temperature
- 1/4 cup (4 Tbsp; 56g) unsalted butter, softened to room temperature
- 1 and 1/2 cups (180g) confectioners’ sugar, sifted (plus more for topping)
- 1/2 teaspoon pure vanilla extract
Instructions
- Step 1: Preheat your oven to 350°F (177°C). Line two large baking sheets with parchment paper or silicone baking mats for a nonstick surface. Set aside.
- Step 2: In a medium bowl, whisk together the flour, cocoa powder, baking soda, and salt until well combined.
- Step 3: In a large bowl, beat the butter with a mixer on medium-high speed for about 1 minute until smooth and creamy. Add the brown sugar and beat on medium-high until fluffy.
- Step 4: Beat in the egg on high speed, scraping down the bowl as needed. Then mix in the vanilla and buttermilk. The batter may look slightly curdled, but that’s fine.
- Step 5: On low speed, gradually add the dry ingredients until just combined. Add gel red food coloring gradually to reach a deep red color (about 1 teaspoon).
- Step 6: Using a spoon or scoop, drop about 1 and 1/2 tablespoons of batter onto the prepared baking sheets, spacing each about 3 inches apart.
- Step 7: Bake for 10–12 minutes, or until the centers look set (around 11 minutes works well). Let the cookies cool completely on the baking sheets before assembling.
- Step 8: For the filling, beat the cream cheese in a clean bowl on high speed for 1 minute until smooth. Add the butter and beat until combined.
- Step 9: Mix in the sifted confectioners’ sugar and vanilla extract. Beat on medium-high speed until creamy and fluffy.
- Step 10: Match cookies of similar size in pairs. Spread the cream cheese filling on the flat side of one cookie and sandwich with the other. Repeat with remaining cookies.
- Step 11: Optionally, sprinkle confectioners’ sugar on top. Store leftovers covered in the refrigerator for up to one week.
Tips & Variations
- Use a small offset spatula for spreading the filling evenly and neatly.
- For a more intense red color, add gel food coloring a little at a time to avoid overdoing it.
- If you don’t have buttermilk, mix 2/3 cup milk with 2 teaspoons vinegar or lemon juice and let it sit for 5 minutes before using.
- Try adding a pinch of cinnamon or espresso powder to the batter for a subtle flavor boost.
Storage
Store the whoopie pies in an airtight container in the refrigerator for up to one week. Bringing them to room temperature before serving improves the texture and flavor. They can also be frozen for longer storage; thaw overnight in the refrigerator before enjoying.
How to Serve
Serve this delicious recipe with your favorite sides.
FAQs
Can I make the batter ahead of time?
It’s best to bake the batter fresh for the fluffiest results. However, you can prepare the batter and refrigerate it for up to 24 hours before baking. Bring it back to room temperature and give it a gentle stir before baking.
What if I don’t have gel food coloring?
Gel food coloring provides deeper color without thinning the batter. If you only have liquid food coloring, use less to avoid altering the texture, but the color might be lighter and you may need to adjust the amount carefully.
PrintRed Velvet Whoopie Pies Recipe

These Red Velvet Whoopie Pies are a delightful treat featuring soft, moist red velvet cookies sandwiched with a luscious cream cheese filling. Perfect for special occasions or an everyday indulgence, they combine the classic flavors of cocoa and vanilla with a rich cream cheese frosting creating an irresistible combination.
- Prep Time: 20 minutes
- Cook Time: 12 minutes
- Total Time: 32 minutes
- Yield: Approximately 24 whoopie pies (48 cookies) 1x
- Category: Dessert
- Method: Baking
- Cuisine: American
Ingredients
Red Velvet Cookies
- 2 cups (250g) all-purpose flour (spooned & leveled)
- 3 Tablespoons (15g) unsweetened natural cocoa powder
- 1 teaspoon baking soda
- 1/2 teaspoon salt
- 1/2 cup (8 Tbsp; 113g) unsalted butter, softened to room temperature
- 1 cup (200g) packed light brown sugar
- 1 large egg, room temperature
- 2/3 cup (160ml) buttermilk, room temperature
- 2 teaspoons pure vanilla extract
- Gel red food coloring (about 1 teaspoon to achieve deep red color)
Cream Cheese Filling
- 6 ounces (170g) full-fat brick cream cheese, softened to room temperature
- 1/4 cup (4 Tbsp; 56g) unsalted butter, softened to room temperature
- 1 and 1/2 cups (180g) confectioners’ sugar, sifted (plus more for topping)
- 1/2 teaspoon pure vanilla extract
Instructions
- Preheat Oven and Prepare Baking Sheets: Preheat your oven to 350°F (177°C). Line two large baking sheets with parchment paper or silicone baking mats to ensure a nonstick surface for baking the cookies.
- Combine Dry Ingredients: In a bowl, whisk together the flour, cocoa powder, baking soda, and salt until well mixed.
- Cream Butter and Sugar: Using a handheld or stand mixer with a paddle attachment, beat the softened butter on medium-high speed for 1 minute until smooth and creamy. Add the light brown sugar and beat again on medium-high until fluffy and combined.
- Add Egg and Wet Ingredients: Beat in the egg on high speed, scraping down the bowl as needed. Once fully incorporated, mix in the vanilla extract and buttermilk. The batter may appear curdled – this is normal.
- Mix Dry into Wet: On low speed, gradually add the dry ingredients to the wet mixture until just combined. Then add gel red food coloring, approximately 1 teaspoon, to reach a deep red hue, mixing until evenly colored.
- Scoop and Bake Cookies: Spoon or scoop about 1 and 1/2 tablespoons of batter per cookie onto the prepared baking sheets, spacing each mound about 3 inches apart. Bake for 10-12 minutes, until centers appear set (usually 11 minutes).
- Cool Cookies: Remove from oven and allow cookies to cool completely on the baking sheet before handling to ensure they set properly.
- Prepare Cream Cheese Filling: In a large bowl, beat the softened cream cheese on high speed with a paddle or whisk attachment until smooth and creamy, about 1 minute. Add the softened butter and beat until fully combined.
- Add Sugar and Vanilla to Filling: Mix in the sifted confectioners’ sugar and vanilla extract. Beat on medium-high speed until creamy and smooth.
- Assemble Whoopie Pies: Pair cookies by similar size. Spread a generous layer of cream cheese filling onto the flat side of one cookie and sandwich with the other cookie’s flat side. Repeat for all cookies.
- Optional Finishing Touch: Sprinkle additional confectioners’ sugar on top of each whoopie pie for decoration.
- Storage: Store leftover whoopie pies in an airtight container in the refrigerator for up to 1 week.
Notes
- Ensure all cold ingredients such as butter, eggs, and buttermilk are brought to room temperature to help create a smooth batter.
- Using gel red food coloring is preferred to achieve vibrant color without affecting batter consistency.
- Do not overbake the cookies as they should be soft and moist to create the perfect whoopie pie texture.
- Line baking sheets with parchment or silicone mats to prevent sticking and promote even baking.
- Adjust food coloring as needed for color preference, starting with about 1 teaspoon.
- Leftover whoopie pies can be frozen for up to 2 months if wrapped tightly; thaw in refrigerator before serving.
Keywords: Red Velvet Whoopie Pies, Cream Cheese Filling, Red Velvet Cookies, Holiday Desserts, Valentine Treats